Freshly cut cherry wood has a specific scent that hits you the second the sandpaper creates enough friction to warm the surface. It is a mix of toasted sugar and damp earth. When you hold these spoons, you feel the weight of the grain. This is not just a kitchen utensil; it is a canvas for a legacy. Creating personalized wooden spoons for a bridal shower is the ultimate power move in the crafting world because it combines high-utility physics with deep emotional resonance. You are working with a material that is biologically unique. No two grain patterns are identical. As you run your thumb over the bowl of the spoon, you are looking for that perfect balance of density and smoothness. We are going to take these raw, porous surfaces and transform them into heirloom pieces using precision pyrography and hand-finishing techniques. Grab your safety glasses and a cold drink. We are about to dive into the molecular structure of wood and the art of the perfect burnish.
THE STUDIO KIT
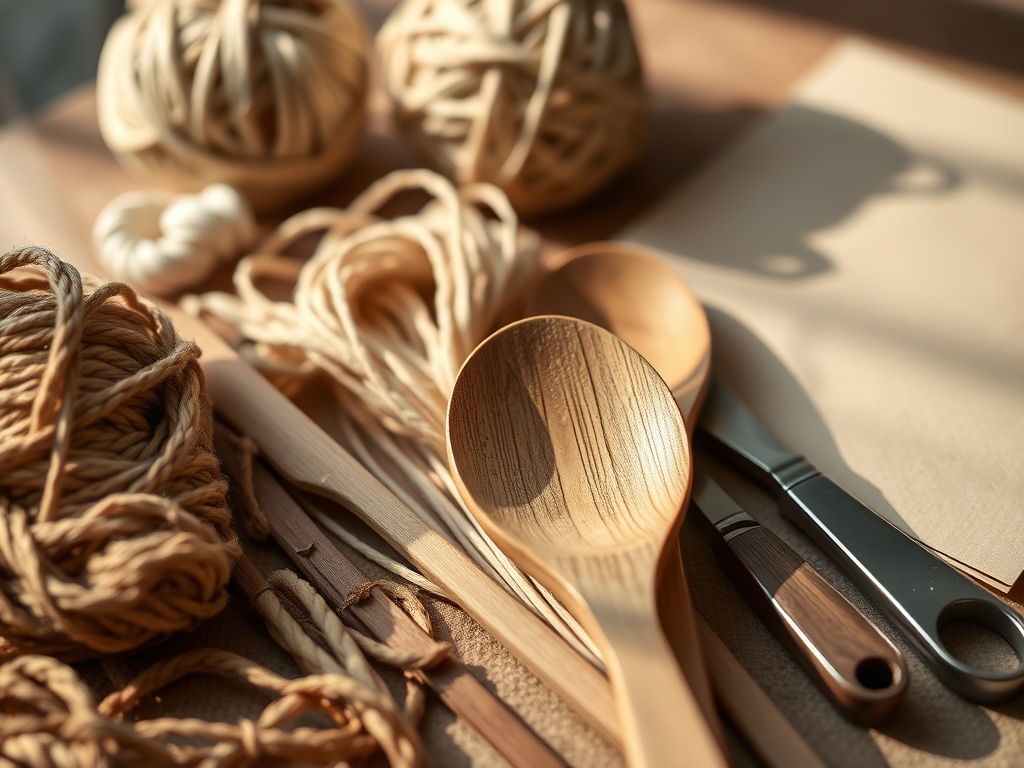
To master the art of personalized wooden spoons, you need a kit that respects the tensile strength and cellular structure of your timber. You will need a professional-grade pyrography pen with interchangeable wire nibs. Unlike cheap craft store burners, a high-voltage unit allows for precise thermal control, which prevents "char-bleeding" into the surrounding fibers. You also need a set of digital calipers to ensure your heart motifs are perfectly centered and scaled to the spoon bowl's diameter. For the finishing stage, gather a range of sandpaper grits from 120 up to 400.
For the "Mastery Finish," keep a bottle of food-grade fractionated coconut oil or pure tung oil nearby. Unlike olive oil, these will not go rancid over time. If you cannot find cherry or maple spoons, a great Material Substitution is beechwood. It has a tight, diffuse-porous grain that resists splintering and takes heat exceptionally well. Avoid pine or softwoods; their high resin content causes "sapping" when heated, which ruins your nibs and creates a messy, uneven burn.
THE TEMPO
The "Maker's Rhythm" is all about respecting the cooling and curing cycles of your materials. For a set of six spoons, budget roughly four hours of active studio time. The first hour is the Calibration Phase, where you prep the wood and sketch your motifs. The second and third hours are the Thermal Phase, where the actual burning happens. This requires a steady, slow hand to ensure the carbonization is deep enough to last through years of dishwashing. The final hour is the Hydration Phase, where you apply the oil and allow the wood fibers to swell and seal. Never rush the cooling of your pyrography pen; thermal shock can snap the delicate wire nibs.
THE CORE METHOD
1. Surface Preparation and Leveling
Before the first spark flies, you must prep the surface to remove any factory glazes. Use your 220-grit sandpaper to sand in the direction of the grain. Technical Fact: Sanding against the grain creates micro-tears in the tracheids, which will catch the pyrography nib and cause "stuttering" marks. Once smooth, wipe the spoon with a tack cloth to remove all dust.
Mastery Tip: Use a damp cloth to "raise the grain" after your first sand. This causes the loose fibers to stand up. Once dry, sand them off again for a glass-like finish that stays smooth even after getting wet.
2. Geometric Mapping with Calipers
Use your digital calipers to find the exact center of the spoon bowl. Lightly mark your heart motif boundaries with a 2H pencil. A 2H lead is hard enough to leave a mark without depositing excess graphite that could interfere with the heat transfer.
Mastery Tip: Symmetry is a product of structural integrity. By mapping the "lobes" of the heart relative to the spoon's central axis, you ensure the design does not look warped when viewed from different angles.
3. The Outline Burn
Set your pyrography station to a medium-high heat. Using a fine-point nib, trace the outline of your heart. Do not press down. Let the heat do the work. Technical Fact: Wood is a natural insulator; the heat stays localized, allowing for crisp lines if the pen movement is consistent.
Mastery Tip: Maintain a constant "feed rate." If you stop moving, the heat will pool and create a deep pit known as a "heat bloom." Keep the pen gliding like a skater on ice.
4. Texture and Depth Graduation
For the internal motifs, switch to a shading nib. This is where you add personality. You can use a "stippling" technique for a hammered look or "contour shading" to give the heart a 3D effect.
Mastery Tip: This involves capillary action. When you apply heat to the wood, you are essentially caramelizing the lignin. Shading at a lower temperature allows for a gradient of browns rather than a flat black, adding professional depth.
5. Grain Sealing and Burnishing
Once the design is burnt, use a bone folder or a very smooth piece of hardwood to "burnish" the design. Rub the wood vigorously. This flattens the scorched fibers and creates a natural sheen.
Mastery Tip: Burnishing increases the surface density of the wood. By compressing the fibers, you make the spoon more resistant to water penetration and staining from colorful foods like turmeric or beets.
6. The Oil Saturation
Apply your food-grade oil using a lint-free cloth. Watch as the wood shifts from a dull tan to a rich, vibrant amber. The oil penetrates the porous structure and replaces air pockets with a protective barrier.
Mastery Tip: This is a matter of hydrophobic protection. The oil molecules are larger than water molecules, effectively "plugging" the wood's pores and preventing the spoon from cracking or warping over time.
THE TECHNICAL LEDGER
Maintenance & Longevity: To keep these personalized wooden spoons in heirloom condition, they must be hand-washed only. High-heat dishwashers cause the wood to expand and contract rapidly, leading to "checking" or small cracks along the grain lines. Re-oil the spoons every six months to maintain the moisture barrier.
Material Variations: For a premium upgrade, look for Black Walnut. It has a high tannin content which creates a stunning contrast with the burn marks. For a sustainable option, bamboo is excellent, though its high silica content will dull your sanding tools faster than traditional hardwoods.
The Correction:
- The Blotched Burn: If the burn is too dark or uneven, do not panic. Use a 120-grit sandpaper to "erase" the top layer of carbon and start the section over.
- The Grain Snag: If your nib gets stuck in a soft grain pocket, use an awl to gently scrape out the charred buildup from the nib before continuing.
- The Oiling Halo: If the oil seems to "bead" and not soak in, the wood may still have a factory wax coating. Strip it with a light wash of mineral spirits, let it dry completely, and re-apply the oil.
Studio Organization: Store your finished spoons in a cool, dry place away from direct sunlight. UV rays can "bleach" the wood over time, fading the beautiful contrast of your pyrography. Use acid-free tissue paper to wrap each spoon to prevent the oil from transferring between pieces.
THE FINAL REVEAL
Look at that glow! You have just turned a simple kitchen tool into a piece of functional art. The weight of the wood, the precision of the burnt heart motifs, and the silky finish make these personalized wooden spoons the absolute star of the bridal shower. You did not just make a gift; you engineered a memory using heat, friction, and organic chemistry. Your friend is going to feel the love every time she stirs a pot of soup.
STUDIO QUESTIONS
What is the best wood for wood burning?
Hardwoods like maple, cherry, and beech are superior. They have a tight grain and low resin content, which ensures a clean, crisp burn without excessive smoke or bleeding. Avoid softwoods like pine, which can sap and ruin your equipment.
Can I use a regular soldering iron?
While possible, it is not recommended for precision work. Soldering irons lack the thermal stability and specialized nib shapes required for detailed motifs. Professional pyrography pens offer much better control over the carbonization process for a cleaner look.
Are wood-burned spoons safe for food?
Yes, provided you do not use lead-based pencils for sketching and you finish the spoon with a food-safe oil. The burning process simply carbonizes the wood fibers. Avoid using any chemical stains or varnishes that are not labeled as food-grade.
How do I clean my pyrography nibs?
Use a polishing compound or a specialized cleaning pad while the nib is cool. Carbon buildup acts as an insulator, making the pen less efficient. Keeping your nibs shiny ensures even heat distribution and prevents "dragging" across the wood surface.
Why did my wood crack after oiling?
Cracking usually occurs if the wood was not properly seasoned or if it was exposed to extreme temperature shifts. Ensure your spoons are completely dry before oiling. The oil should be applied at room temperature to ensure even absorption into the fibers.