Grab your jeweler's loupe and a fresh pair of nitrile gloves because we are about to immortalize your wedding day through the lens of physics. There is a specific, electric thrill in handling a bridal bouquet; the petals are heavy with moisture, their cell walls still rigid with turgor pressure. But as any maker knows, beauty is fleeting unless you intervene with a little bit of science. We are diving deep into the world of Personalized Floral Pressings to transform those fragile blooms into permanent, glass-encased heirlooms. This process is not just about aesthetics; it is a meticulous negotiation with moisture content and structural integrity. You will feel the resistance of the cellulose fibers as you prepare each stem, and the cool, slick surface of the glass will become your canvas. We are going to strip away the bulk, manage the capillary action of the drying paper, and create a composition that defies the natural cycle of decay. It is time to turn that sentimental bundle of greenery into a high-end specimen of art.
THE STUDIO KIT
THE STUDIO KIT
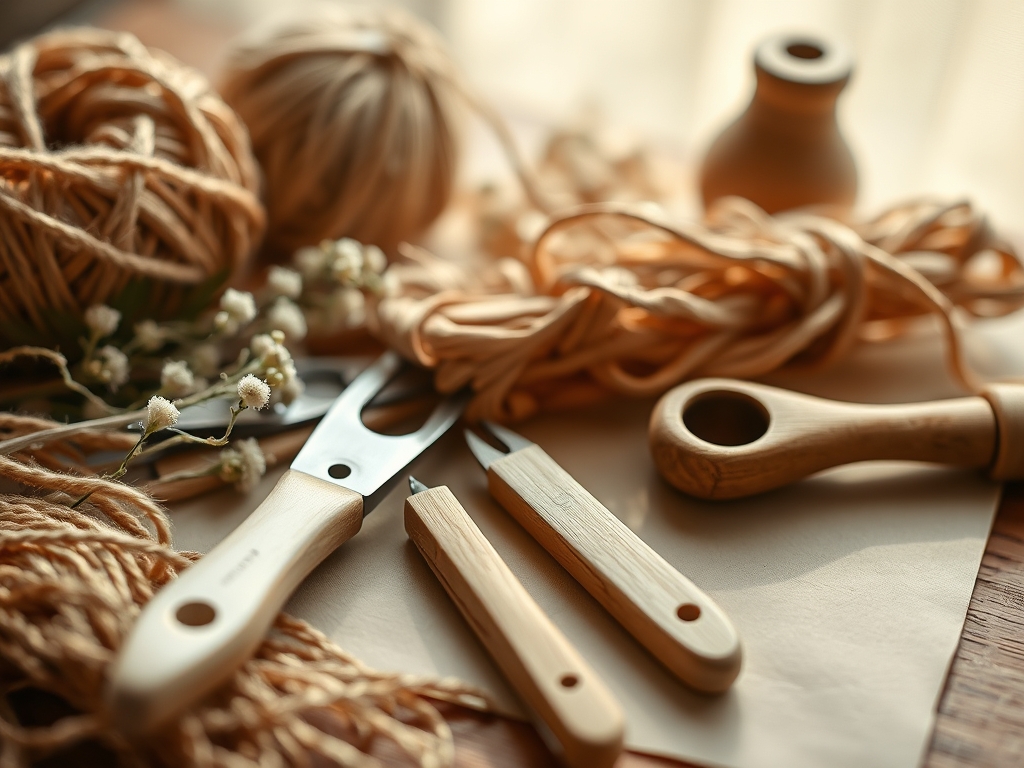
To achieve professional-grade Personalized Floral Pressings, you need tools that respect the delicate anatomy of the flora. Your primary engine is a heavy-duty wooden flower press equipped with stainless steel bolts and wing nuts to apply uniform, high-torque pressure. You will need acid-free blotting paper with a high GSM (grams per square meter) to maximize moisture absorption without transferring texture to the petals. A pair of fine-tipped precision tweezers is essential for manipulating stamen without bruising the tissue. For the framing, use double-pane float glass and a high-quality copper foil tape if you plan on soldering, or a minimalist brass frame with a secure locking mechanism.
Material Substitutions: If you lack a professional press, you can use heavy architectural books, provided you line them with neutral-pH parchment paper. Instead of a specialized floral knife, a fresh X-Acto blade or a scalpel will suffice for dissecting thick calyxes. If you cannot find copper foil, UV-resistant silicone adhesive applied with a micro-nozzle can secure the glass edges, though it lacks the vintage aesthetic of metal.
THE TEMPO
The maker's rhythm for floral preservation is a slow burn. You cannot rush the evaporation of water from organic tissue without risking "cooked" or browned petals. The Initial Dissection takes about two hours of focused, ergonomic work. Once the specimens are "set" in the press, the Dehydration Phase lasts between two to four weeks, depending on the ambient humidity of your studio. You should check the blotter sheets every forty-eight hours during the first week to prevent mold. Finally, the Composition and Sealing phase requires a solid three-hour block of uninterrupted time to ensure no dust or stray fibers are trapped behind the glass.
THE CORE METHOD
1. The Surgical Deconstruction
Before a flower can be pressed, it must be flattened without losing its silhouette. Use your scalpel to slice thicker blooms, like roses or ranunculus, vertically down the center. This reduces the bulk density of the flower, allowing the press to apply even force across the entire surface area.
Mastery Tip: By removing the posterior half of the receptacle (the thick part where the stem meets the head), you reduce the distance moisture must travel to escape. This accelerates the drying process and prevents the center from rotting while the edges dry.
2. Strategic Loading
Place your specimens on the blotting paper, ensuring no two elements overlap unless you want them to fuse. The porous nature of the paper will draw out moisture through osmosis. Layer the cardboard spacers between the blotting sheets to allow for airflow through the "flutes" of the cardboard.
Mastery Tip: Pay attention to the grain direction of the petals. Placing them face down ensures the "show side" remains smooth, as the weight of the press will burnish the fibers against the flat surface of the paper.
3. Tension and Torque
Tighten the wing nuts on your press in a diagonal pattern, much like tightening the lug nuts on a car tire. This ensures the tensile stress is distributed equally across the wooden platens, preventing the wood from warping and ensuring the flowers do not slide out of alignment.
Mastery Tip: Over-tightening in the first twenty-four hours can crush the delicate cell walls too aggressively, leading to "translucent" spots. Start with firm pressure and increase the torque daily as the moisture evaporates.
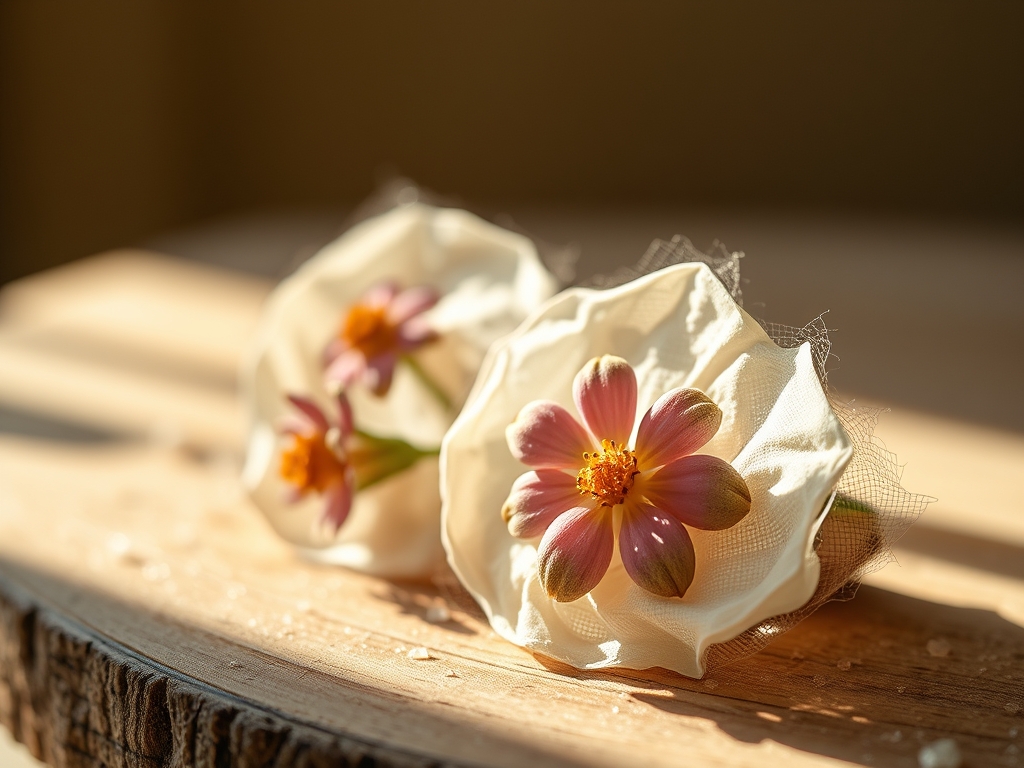
4. The Glass Layout
Once dry, the flowers are incredibly brittle. Use your precision tweezers to transfer them to the glass. This is where you execute your Personalized Floral Pressings design. Aim for a balanced distribution of "visual weight," using smaller filler flowers like Queen Anne's Lace to bridge the gaps between larger focal blooms.
Mastery Tip: Use a tiny drop of acid-free adhesive on the back of the thickest part of the stem to prevent the specimen from shifting due to gravity once the frame is hung.
5. Hermetic Sealing
Clean the glass with a lint-free microfiber cloth and isopropyl alcohol to remove all fingerprints. Place the top pane of glass down carefully to avoid creating a "gust" of air that might blow your arrangement out of place. Seal the edges tightly to prevent oxygen and humidity from re-entering the chamber.
Mastery Tip: The vacuum-like seal created between two panes of glass relies on surface tension. Ensuring the glass is perfectly flat and free of debris allows the panes to "grip" each other, protecting the organic material from oxidation.
THE TECHNICAL LEDGER
Maintenance & Longevity: To prevent UV degradation (fading), display your pressings away from direct sunlight. The photochemical reaction caused by UV rays will break down the natural pigments in the petals over time. Use UV-filter glass for premium projects to extend the color life by years.
Material Variations: For a sustainable approach, use recycled handmade paper with visible inclusions for the backing. For a premium, "museum" look, opt for low-iron museum glass which offers 99% clarity and zero green tint, making the colors of your Personalized Floral Pressings pop with high fidelity.
The Correction:
- Brown Centers: This is caused by trapped moisture. Fix it by pre-treating thick centers with a silica gel desiccant for 24 hours before putting them in the press.
- Slippage: If flowers move during framing, use a bone folder to gently press the glass panes together more tightly before securing the clips.
- Petal Translucency: This happens when the press is too wet. Change your blotting paper more frequently in the first 72 hours to maintain a high absorption gradient.
Studio Organization: Store your dried, un-framed specimens in acid-free glassine envelopes inside a climate-controlled cabinet. Use a hygrometer to ensure the storage area stays below 40% humidity to prevent the re-absorption of moisture into the cellulose.
THE FINAL REVEAL
There is nothing quite like the moment you flip that glass frame over and see your wedding bouquet transformed into a two-dimensional masterpiece. The colors, though muted into a vintage palette, hum with the memory of the day. The structural integrity of the arrangement, once a heavy, wilting mass, is now a sleek, sophisticated display of botanical geometry. Your Personalized Floral Pressings serve as a technical marvel and a sentimental anchor, proving that with the right tools and a bit of physics, you can stop time itself.
STUDIO QUESTIONS
How do I prevent my pressed flowers from turning brown?
Browned tissue results from slow drying. Increase the evaporation rate by using fresh blotting paper every 48 hours and ensuring your press is stored in a warm, dry environment with consistent airflow to move moisture away from the specimens.
Can I press thick flowers like succulents or protea?
Thick specimens require surgical dissection. Slice them in half or remove individual petals to press separately. Their high water content makes them prone to mold, so use a silica-infused blotting sheet to accelerate the initial dehydration phase.
What is the best glass for floral pressings?
Use double-strength float glass or UV-protective museum glass. Low-iron glass is preferred for Personalized Floral Pressings because it lacks the green tint of standard glass, ensuring the natural botanical pigments remain color-accurate and vibrant over time.
How do I stop the flowers from sliding in the frame?
Apply a microscopic dot of neutral-pH floral adhesive to the sturdiest part of the plant. This creates enough friction to counteract gravity without damaging the delicate tissue or leaving visible residue on the glass panes.
Why did my petals become transparent after pressing?
Translucency occurs when cell walls collapse and air is replaced by moisture or oils. To fix this, ensure you are using high-absorbency paper and avoid over-tightening the press during the first 24 hours of the dehydration cycle.