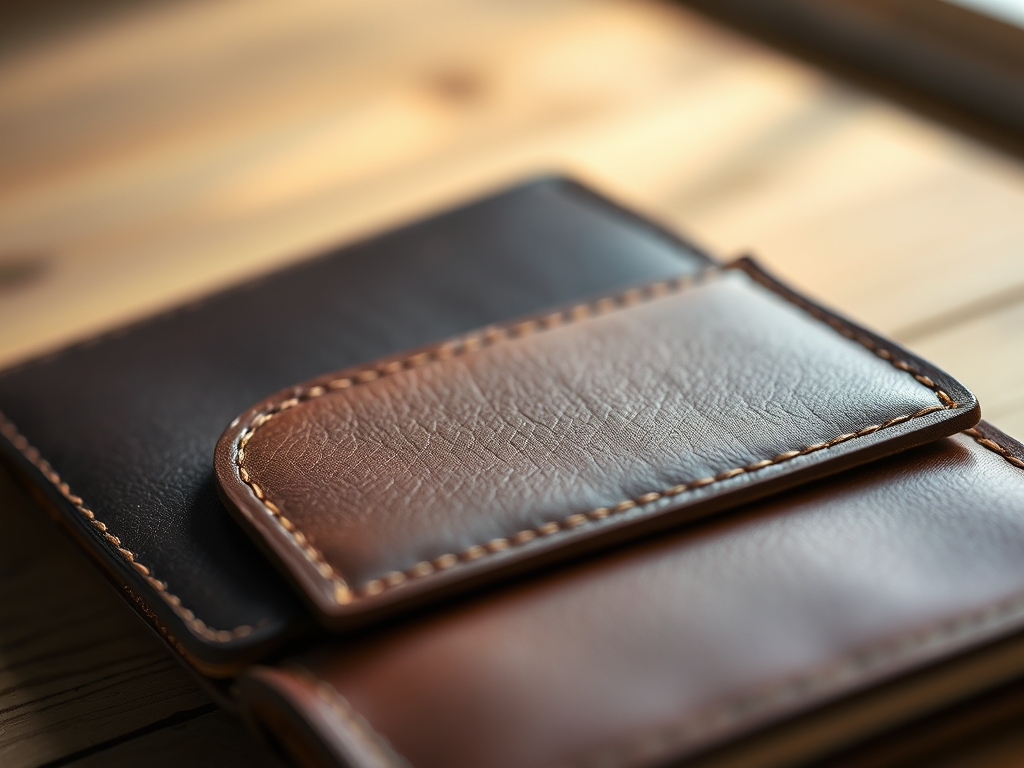
Smell that? That is the intoxicating scent of high-tannin vegetable tanned hide. It is the smell of adventure waiting to happen. When you are standing in a crowded terminal in Singapore or navigating a dusty train station in Morocco; your gear needs to be more than just pretty. It needs to be a fortress for your identity. Custom Leather Passport Holders are the ultimate fusion of utility and tactile luxury. We are talking about a material with a high tensile strength that actually gets better as it absorbs the oils from your hands. Leather is a biological marvel; its dense network of collagen fibers provides a structural integrity that synthetic materials simply cannot replicate. As we dive into these five rugged designs; we are looking for that perfect balance of grain density and flexibility. You want a piece that feels substantial in your palm but slides into a pocket without bulk. Grab your coffee; because we are about to turn a raw animal hide into a travel heirloom that will outlast your current passport by decades.
THE STUDIO KIT
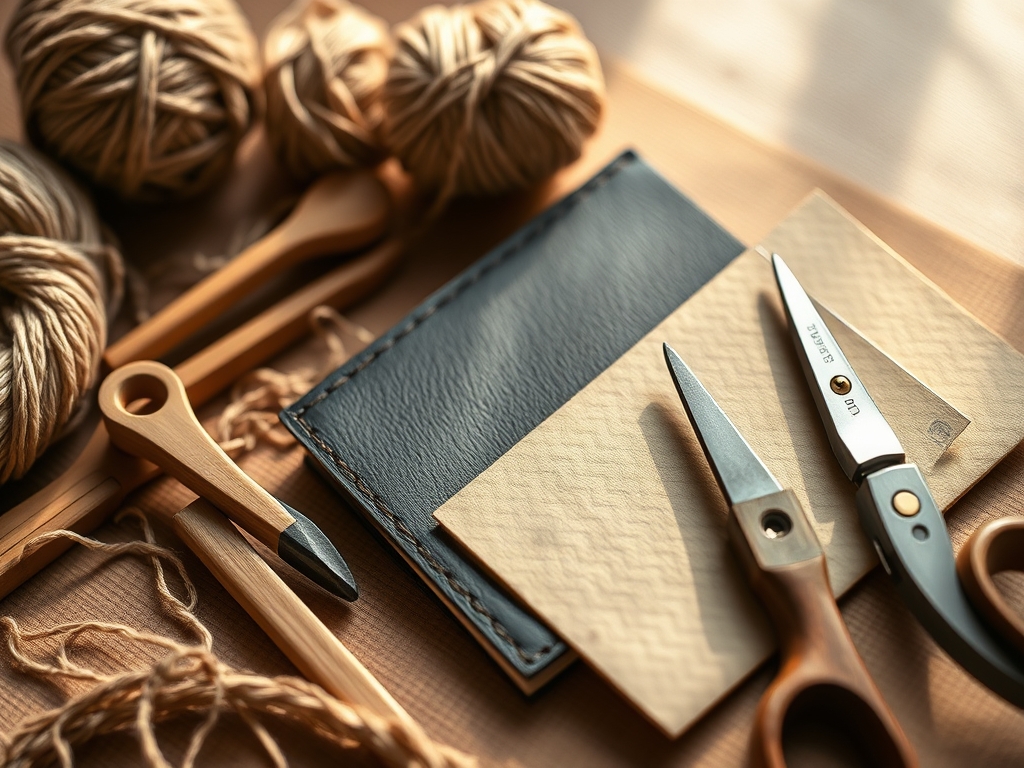
To build these Custom Leather Passport Holders; you need more than just a sharp knife. You need precision instruments that respect the porous nature of the hide. Start with a high-carbon steel rotary cutter or a specialized head knife for those long; sweeping straight lines. You will also need a set of diamond-point stitching chisels to punch through the layers without tearing the fibers. For the edges; a burnishing tool made of cocobolo wood is essential to heat the waxes and seal the grain.
Material selection is where the physics gets fun. I recommend a 3 to 4-ounce weight (about 1.2 to 1.6 millimeters) for the main body. This gauge provides enough stiffness to protect the electronic chip in your passport while remaining thin enough to fold. You will also need bonded nylon thread; specifically a 0.6mm or 0.8mm diameter; because it resists rot and has a higher breaking point than cotton.
Material Substitutions: If you cannot source traditional veg-tan leather; look for "crazy horse" leather; which is a chrome-tanned hide infused with heavy waxes. It creates a beautiful pull-up effect where the color lightens when folded. For a vegan alternative; cork fabric offers surprisingly high abrasion resistance; though it lacks the same edge-burnishing capabilities as animal hide.
THE TEMPO
Creating a rugged passport holder is a marathon; not a sprint. The "Maker's Rhythm" is all about respecting the drying times and the physical resistance of the material.
The Blueprint Phase (30 Minutes): This involves measuring your passport with digital calipers to ensure a 3mm clearance on all sides. Precision here prevents the dreaded "tight fit" that makes your passport buckle.
The Cut and Prep (1 Hour): Cutting through leather requires slow; steady pressure to prevent the blade from wandering along the grain direction.
The Stitching Marathon (2 to 3 Hours): This is the meditative core of the project. Hand-stitching a saddle stitch is a rhythmic process that ensures if one thread breaks; the entire seam stays intact.
The Finishing Flourish (1 Hour): Edge painting and burnishing require multiple coats and sanding intervals. You are waiting for the capillary action of the leather to pull the dyes deep into the fibers.
THE CORE METHOD
1. Precision Templating and Cutting
Lay your leather flat on a self-healing cutting mat. Use a metal ruler to guide your rotary cutter. You are aiming for two main pockets and one large outer shell. Remember that leather has a "stretch" direction; always cut your pockets so the stretch runs horizontally to accommodate the passport's thickness.
Mastery Tip: Understand the tensile strength of your specific hide. If you cut against the grain; the leather may elongate over time; causing the passport to slip out. Always align your longest cuts with the spine of the animal for maximum stability.
2. Beveling the Edges
Take an edge beveler and run it at a 45-degree angle along the raw edges of your cut pieces. This removes the sharp "corner" of the leather. It is not just for aesthetics; it prevents the edges from mushrooming or fraying over time.
Mastery Tip: This step utilizes ergonomic geometry. By rounding the edge; you reduce the surface area prone to friction; which significantly increases the lifespan of the holder during frequent travel.
3. Creating the Stitching Groove
Use a wing divider to mark a light line 3.5mm from the edge. Then; use a stitching groover to remove a tiny sliver of leather. This creates a recessed channel where your thread will sit; protecting it from being rubbed and snapped during use.
Mastery Tip: This is about structural integrity. By nesting the thread below the surface of the leather; you are shielding the structural bond from mechanical abrasion.
4. The Saddle Stitch
Thread two needles on a single length of waxed nylon thread. Pass one needle through the first hole; then pass both needles through every subsequent hole from opposite sides. This creates an interlocking "X" inside the leather.
Mastery Tip: This technique relies on friction-lock physics. Unlike a sewing machine lockstitch; a saddle stitch will not unravel because the two threads are physically knotted at every single puncture point.
5. Burnishing and Sealing
Apply a small amount of tragacanth gum or beeswax to the edges. Use your wooden burnisher to rub the edge rapidly until you hear a "tack" sound and see a glossy shine.
Mastery Tip: The heat generated by friction causes the leather fibers to fuse together. This creates a hydrophobic barrier that prevents moisture from entering the internal structure of the hide.
THE TECHNICAL LEDGER
Maintenance & Longevity: To keep your Custom Leather Passport Holders in peak condition; apply a high-quality neatsfoot oil or beeswax cream every six months. This restores the lipids within the leather; preventing the fibers from becoming brittle and snapping.
Material Variations:
- Sustainable: Look for "Ecopell" certified leathers which use vegetable extracts like mimosa and quebracho.
- Premium: Shell Cordovan is the "holy grail" of leathers; taken from the fibrous flat muscle of a horse's hindquarters; it is virtually non-porous and incredibly durable.
The Correction:
- Mistake: The leather is too stiff to fold. Fix: Use a bone folder to compress the fibers along the fold line; or lightly dampen the grain side with distilled water before folding.
- Mistake: Uneven stitching tension. Fix: Use a stitching pony to hold the leather vertically; ensuring you pull both hands with equal force for every stitch.
- Mistake: The dye is bleeding. Fix: Apply a "resolene" or acrylic finisher to lock the pigment into the porous surface.
Studio Organization: Store your leather flat in a cool; dry place away from direct sunlight. UV rays break down the tannins in the leather; leading to "red rot" or premature fading. Use acid-free paper between hides to prevent oil transfer.
THE FINAL REVEAL
There is nothing quite like the moment you slide your passport into a holder you built with your own two hands. The fit is snug; the edges are glassy; and the weight feels like a promise of future journeys. These Custom Leather Passport Holders are not just accessories; they are tactile journals of where you have been and where you are going. As the leather develops a patina; it will darken and soften; recording every security checkpoint and coffee shop visit in its grain. You have mastered the physics of the hide; now go out there and show it the world!
STUDIO QUESTIONS
What is the best leather thickness for passport holders?
The ideal thickness is 3oz to 4oz (1.2mm to 1.6mm). This provides enough tensile strength to protect the document without creating excessive bulk in your pocket or carry-on bag.
Why should I use vegetable-tanned leather?
Vegetable-tanned leather uses natural tannins; allowing it to develop a unique patina over time. It is also firm enough to be burnished; which creates a water-resistant seal on the edges.
Can I use a sewing machine for this project?
While possible; a standard machine often struggles with the density of heavy leather. A hand-sewn saddle stitch is far superior for longevity; as it will not unravel if a single stitch fails.
How do I fix a scratch on my leather holder?
For light scratches; simply rub the area briskly with your thumb. The heat and natural oils will often blend the scratch back into the porous surface of the hide.
What thread is strongest for leather work?
Bonded nylon or braided polyester thread is best. These materials offer high breaking strength and are resistant to the friction and moisture encountered during international travel.