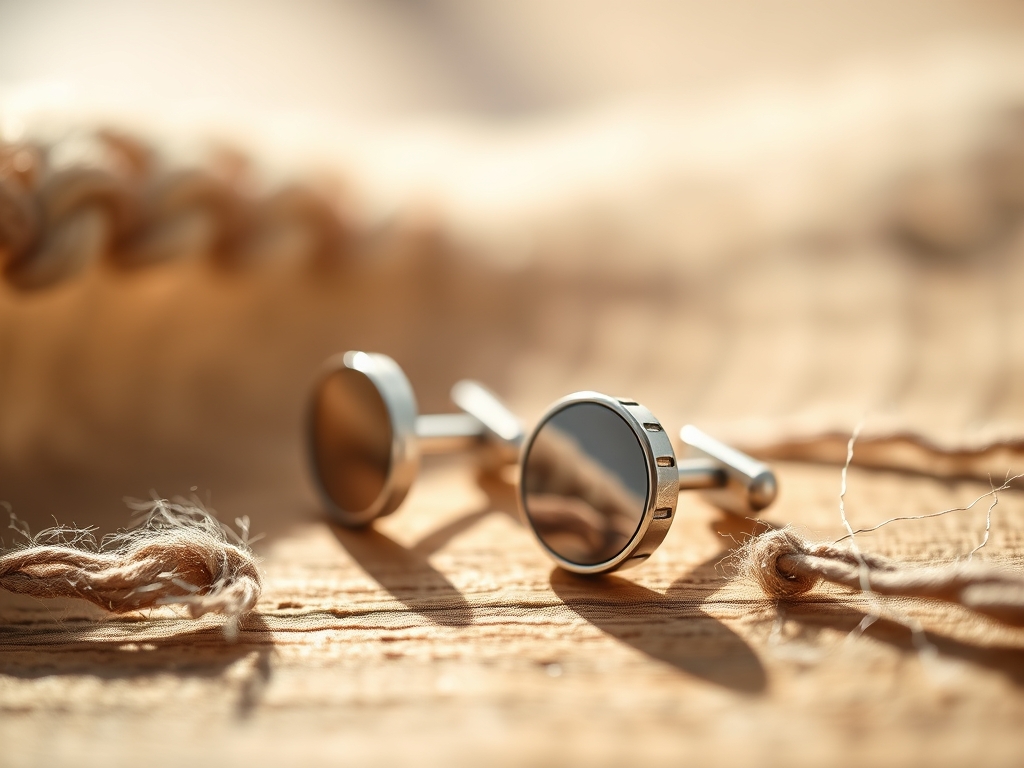
The scent of scorched flux and the cool, heavy weight of a 925 sterling slab in your palm is the ultimate creative high. When you are crafting custom silver cufflinks for a groom, you are not just making jewelry; you are engineering a legacy piece that must survive decades of celebratory hugs and frantic dancing. Silver is a fascinating beast because it is highly conductive and surprisingly soft in its annealed state. You can feel the molecular shift as you hammer the metal, moving from a pliable, buttery texture to a rigid, work-hardened state. This transition is where the magic happens. To create something truly sophisticated, we have to respect the metallurgical properties of the material while maintaining a sharp, modern aesthetic. We are aiming for a finish so crisp it looks like it was born in a high-end boutique, but with the structural integrity of a bridge. Let us get our hands dirty and turn that raw metal into a pair of custom silver cufflinks that will make the wedding photos pop.
THE STUDIO KIT
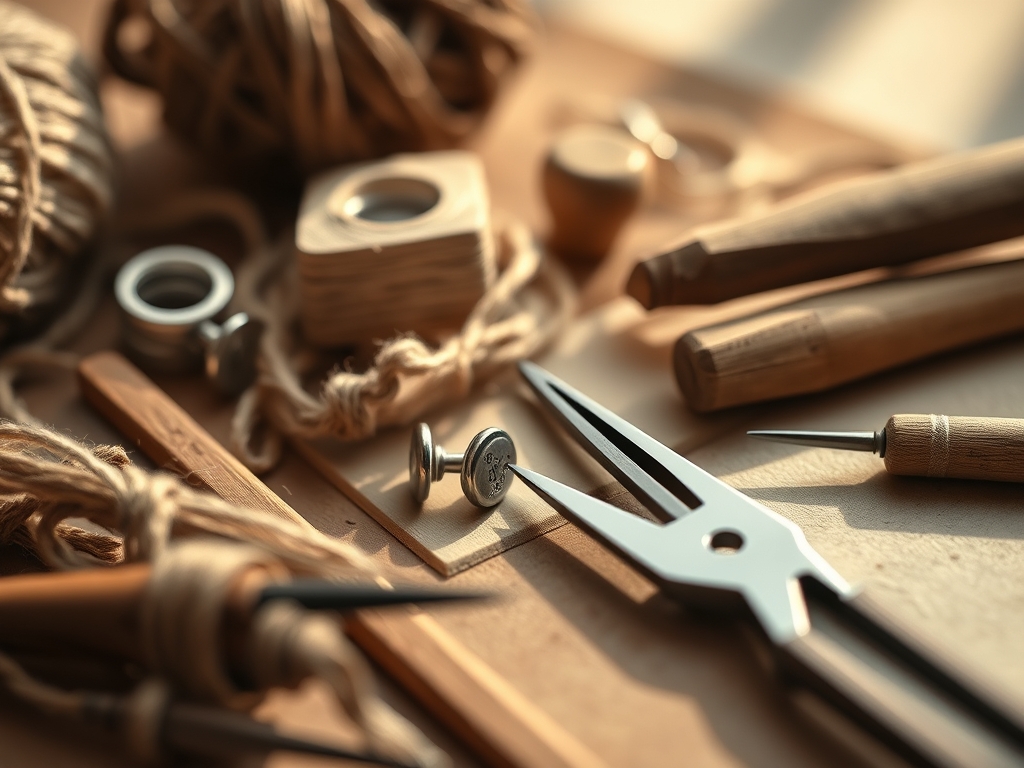
To master this project, your bench needs to be a shrine to precision. You will need a jeweler's saw with 4/0 blades for those intricate interior cuts; anything thicker will snag and warp your fine lines. A bench pin is your best friend here, providing the necessary support to prevent the silver from bending under the pressure of the blade. For shaping, keep a set of needle files in various grits and a rawhide mallet nearby to avoid marring the surface during forming. We will be using hard, medium, and easy silver solder to manage our heat zones effectively.
Material Substitutions: If sterling silver is too pricey for your first practice run, swap it out for nickel silver or alkeme. Both mimic the tactile weight of precious metal but are far more forgiving on the wallet. However, remember that nickel silver has a higher melting point and will require more aggressive torch work to reach a flow state. For the findings, if you cannot source pre-made silver toggle backs, you can fabricate your own using 16-gauge silver wire and a pair of round-nose pliers.
THE TEMPO
The "Maker's Rhythm" is all about managing your heat and your patience. Expect to spend about four to six hours on a pair of high-quality custom silver cufflinks. The first hour is dedicated to the layout and piercing, where focus is paramount. The second phase is the soldering dance, which takes about forty-five minutes of intense concentration to ensure you do not melt your hard work into a puddle. The final three hours are purely for finishing and polishing. This is the slowest part of the tempo because rushing the grit progression will leave visible scratches that the camera will catch instantly.
THE CORE METHOD
1. Designing the Silhouette
Start by sketching your design directly onto the silver sheet using a fine-point permanent marker or a scribing awl. Ensure your proportions are balanced; a standard cufflink face is usually between 15mm and 20mm.
Mastery Tip: Use calipers to ensure both pieces are identical to the millimeter. Symmetry is a sign of professional craftsmanship, and even a one-millimeter deviation can be detected by the human eye when the groom's hands are side-by-side.
2. The Precision Piercing
Secure your silver in the bench pin and begin sawing with long, steady strokes. Let the tool do the work; if you push too hard, you will snap the blade.
Mastery Tip: Lubricate your saw blade with beeswax or a commercial lubricant. This reduces friction and prevents the blade from overheating, which maintains the tensile strength of the steel and prevents jagged edges on your silver.
3. Edge Refinement and Filing
Once the shapes are cut, use your needle files to smooth the edges. Move from a coarse file to a fine one, always filing in a single direction to avoid creating cross-hatched burrs.
Mastery Tip: This process is about mechanical bonding. A perfectly flat, filed surface creates a better contact point for soldering, allowing the solder to flow smoothly through capillary action rather than just sitting on top of the metal.
4. The First Solder Join
Apply a small amount of fluoride-free flux to the back of the cufflink face and the top of the post. Place a tiny "pallion" of hard solder at the junction. Heat the entire piece evenly until the flux goes clear, then focus the flame on the joint.
Mastery Tip: Heat the largest component first. Silver is a heat sink; if you heat the small post directly, it will melt before the larger face reaches the temperature required for the solder to flow.
5. Pickling and Cleaning
After soldering, drop the hot metal into a pickling solution (sodium bisulfate) to remove the fire scale and oxidation.
Mastery Tip: Never use steel tweezers in the pickle. This creates a galvanic cell that will electroplate a thin layer of copper onto your silver, ruining the finish. Always use copper or plastic tongs.
6. Texture and Personalization
Now is the time to add a hammered texture or engrave initials. Use a chasing hammer for a dappled, light-catching effect that masks minor surface imperfections.
Mastery Tip: Work-hardening occurs here. As you strike the metal, the crystal structure compresses, making the silver more durable. Be careful not to over-work it, or the silver will become brittle and crack.
7. The High-Lustre Polish
Start with 400-grit sandpaper and work your way up to 2000-grit. Finish with a rotary tool equipped with a felt buffing wheel and red rouge or Tripoli compound.
Mastery Tip: Use a burnishing tool on the edges to compress the metal fibers. This creates a mirror-like shine and a "closed" surface that is more resistant to tarnish over time.
THE TECHNICAL LEDGER
Maintenance & Longevity: Silver reacts with sulfur in the air to create tarnish. To keep these custom silver cufflinks pristine, the groom should store them in an airtight pouch with an anti-tarnish strip. A quick wipe with a microfiber polishing cloth after each wear will remove skin oils that accelerate oxidation.
Material Variations: For a sustainable twist, use recycled fine silver. It is 99.9 percent pure and softer than sterling, making it ideal for deep, hand-stamped engravings. For a premium upgrade, consider palladium silver, which is more expensive but offers superior tarnish resistance and a darker, "gunmetal" hue.
The Correction:
- Solder won't flow: This is usually due to oxidation or insufficient heat. Clean the joint and re-apply flux.
- Pitting in the metal: This happens if you overheat the silver. Use a lighter touch with the torch and keep the flame moving.
- Misaligned posts: If the toggle is crooked, do not try to bend it. Re-heat the joint until the solder flows, then use a probe to nudge it into place.
Studio Organization: Store your silver sheets in acid-free paper to prevent pre-work oxidation. Keep your files in a rack rather than a drawer to prevent the teeth from dulling against each other.
THE FINAL REVEAL
There is nothing quite like the moment you pull those custom silver cufflinks out of the final polish. They catch the light with a liquid-like brilliance that only genuine silver can provide. You have taken raw, industrial materials and transformed them into a sophisticated accessory that carries the weight of the occasion. These are not just cufflinks; they are a testament to your technical skill and your eye for detail. The groom is going to feel like a million bucks when he clicks these into place.
STUDIO QUESTIONS
What is the best gauge for custom silver cufflinks?
For the face of the cufflink, use 18-gauge or 20-gauge silver sheet. This provides enough thickness for structural integrity without being overly heavy on the shirt cuff. Thinner gauges may warp during the soldering process.
How do I prevent the silver from melting?
Keep your torch flame moving constantly to distribute heat evenly. Watch the flux; when it becomes clear and glassy, you are seconds away from the solder flowing. If the silver starts to glow bright red, pull the heat back immediately.
Can I make these without a torch?
While you can use cold-connections like rivets, traditional custom silver cufflinks require soldering for a seamless, professional look. A small butane torch is sufficient for this scale of work and provides the necessary heat for silver solder.
How do I get a mirror finish?
Progression is key. Never skip a sandpaper grit. Move from 400 to 600, then 800, 1200, and 2000 before using a polishing compound. Each step removes the scratches from the previous one until the surface is perfectly flat and reflective.