
Close your eyes and listen to that specific sound of high quality vegetable tanned leather sliding across a workbench. It is a dense; rhythmic thrum that speaks of durability and ancient craft. When you are tired of your earbuds tangling into a chaotic bird nest in your pocket; you need a solution that respects the physics of fiber. Custom Leather Cord Wraps are not just about aesthetics; they are about managing the kinetic energy of copper wiring. We are diving into the visceral world of grain density and surface tension today. You can feel the oils in the hide reacting to the heat of your palms as you prep your station. This is where utility meets high end tactile satisfaction. We are going to build seven distinct designs that utilize the natural tensile strength of animal hide to keep your tech organized. Grab your favorite mug of coffee because we are about to turn raw materials into engineered art.
THE STUDIO KIT
THE STUDIO KIT
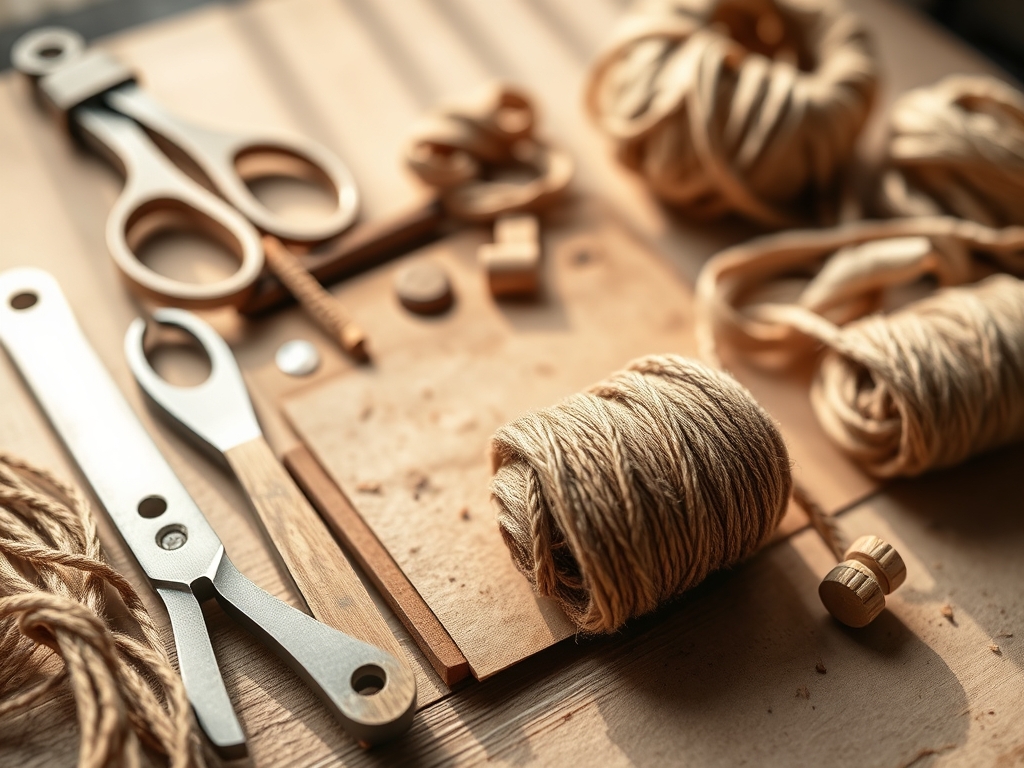
To execute these designs; you need more than just a pair of scissors. We are looking for precision. You will need a rotary cutter with a fresh tungsten carbide blade to ensure clean edges without dragging the grain. A scratch awl is essential for marking your stitch points; while a bone folder will help you create crisp; permanent creases by compressing the internal collagen fibers of the leather. For the hardware; grab a set of solid brass Chicago screws or heavy duty snaps.
Material selection is paramount. I recommend a 3 to 4 ounce vegetable tanned shoulder. This specific weight provides enough rigidity to maintain its shape under the pressure of coiled wire but remains thin enough to stay low profile in your pocket. If you cannot find veg tan; a chrome tanned pull up leather is a viable substitution; though it will have more stretch and less structural memory. Avoid using thin garment leather; as the tensile strength is too low to survive the repetitive friction of cord management.
THE TEMPO
Crafting is a dance of timing. The total "Maker's Rhythm" for a single wrap is roughly forty five minutes; but we work in phases to respect the material. Phase one is the layout and calibration; taking ten minutes to measure your specific headphone gauge with digital calipers. Phase two is the cutting and edge prep; which takes fifteen minutes. This is the meditative part where you burnish the edges until they shine like glass. Phase three is the hardware installation; a quick five minute burst of mechanical assembly. Finally; allow ten minutes for the leather to "set" after you apply a light coat of neatsfoot oil to replenish the lipids lost during the cutting process.
THE CORE METHOD
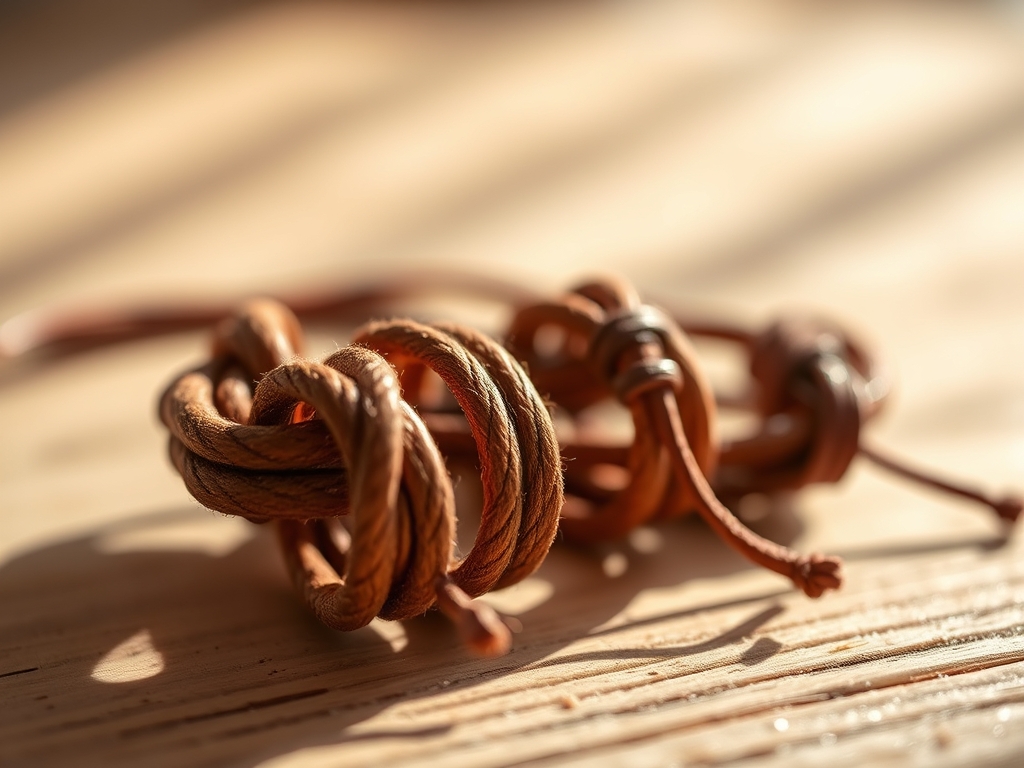
1. The Classic Taco Fold
This is the foundational design for any custom leather cord wraps project. You cut a perfect circle of leather and fold it in half over the coiled wire. Mastery Tip: Understand grain direction. Leather stretches more across the belly than along the spine. Cut your taco so the fold runs parallel to the spine to prevent the leather from sagging or losing its "snap" over time.
2. The Integrated Cord Tab
This design stays permanently attached to your headphones so you never lose the wrap. It involves a small slit at one end where the wire feeds through. Mastery Tip: Use a hollow punch to create a circular relief hole at the end of your slit. This prevents stress fractures from propagating through the leather fibers when the cord is pulled taut.
3. The Double Snap Bridge
Perfect for long charging cables or heavy duty monitor headphones. This uses two points of contact to distribute the weight. Mastery Tip: This design relies on structural integrity. By placing two snaps; you create a bridge that resists the "lever effect" of a heavy coil; ensuring the hardware does not pop open during transit.
4. The Minimalist Pinch
A tiny rectangle with a single center stud. It is the height of efficiency. Mastery Tip: Focus on edge burnishing. Because this design is so small; the edges are the most visible part. Use a wooden slicker and friction to generate heat; which fuses the loose protein fibers together into a smooth; waterproof barrier.
5. The Geometric Hex-Wrap
For the lover of modern lines; this wrap uses angular cuts instead of curves. Mastery Tip: Sharp angles are prone to peeling. Use a skiving knife to slightly thin the leather at the fold points. This reduces the bulk modulus of the material; allowing for a tighter; more professional fold.
6. The Braided Keeper
This involves three thin strips of leather woven together before being capped with hardware. Mastery Tip: This design increases the surface area of the wrap; providing more grip against the slick plastic of your headphone cords. It uses friction to keep the wrap from sliding down the wire.
7. The Heavy Duty Cuff
Designed for studio grade cables that are thick and unruly. Mastery Tip: Use a heavier gauge leather (5 to 6 ounce). Because thick leather is harder to bend; you must "case" it by lightly dampening the grain with a sponge. This temporary increase in plasticity allows you to mold the leather around a cylinder for a custom fit.
THE TECHNICAL LEDGER
Maintenance & Longevity: Leather is a porous; biological material. Every six months; apply a high quality beeswax based conditioner. This seals the pores and prevents environmental moisture from breaking down the internal fiber matrix. If your wrap gets wet; never use a hair dryer. Let it air dry slowly to prevent the collagen from becoming brittle.
Material Variations: For a sustainable twist; look into cork leather or recycled leather composites. While they lack the same modulus of elasticity as top grain hide; they offer a unique texture. For a premium feel; shell cordovan is the gold standard; offering a high density pore structure that is naturally water resistant.
The Correction:
- Mistake: The snap is too loose. Fix: Use a ball peen hammer to slightly flare the post of the snap for a tighter mechanical bond.
- Mistake: The leather is cracking at the fold. Fix: You likely skipped the conditioning phase. Apply a lanolin cream to rehydrate the fibers immediately.
- Mistake: Uneven edges. Fix: Use a 1000 grit sandpaper to level the surface before re-burnishing with gum tragacanth.
Studio Organization: Store your leather scraps and finished wraps in a climate controlled environment. Avoid direct sunlight; as UV radiation breaks down the tannins in the leather; causing "red rot" or significant discoloration. Use breathable cotton bags rather than plastic to prevent mold growth.
THE FINAL REVEAL
There is nothing quite like the feeling of a finished piece that snaps shut with a definitive; authoritative click. Your headphones are no longer a tangled mess; they are a curated kit protected by the best material nature ever engineered. The way the light catches the burnished edges of your custom leather cord wraps proves that you didn't just make a utility item; you mastered the physics of the fold. Toss them in your bag with confidence; knowing that the high tensile strength and ergonomic design will keep your gear safe for years to come. You are officially a master of the wrap!
STUDIO QUESTIONS
What is the best leather weight for cord wraps?
The ideal weight is 3 to 4 ounces. This thickness provides the necessary tensile strength to hold a coil while remaining flexible enough for daily use. Anything thicker becomes too bulky for a pocket; while thinner leather will stretch and fail.
How do I stop the leather from stretching?
Cut your pieces parallel to the spine of the hide. This area has the tightest fiber density. Additionally; applying a resolene finish can help lock the fibers in place and provide a slight increase in surface rigidity.
Can I make these without specialized tools?
Technically yes; but a rotary cutter and burnishing tool are vital for professional results. Without them; your edges will remain "fuzzy;" which leads to faster material degradation as the fibers absorb oils and dirt from your hands.
Why is my snap hardware falling out?
This usually happens if the hole is punched too large. Use a hole punch that is slightly smaller than the snap post. The leather should "grip" the hardware before you even begin the setting process for maximum mechanical stability.
How do I clean my leather wraps?
Use a damp cloth with a tiny drop of saddle soap. Work in a circular motion to lift dirt from the pores. Always follow up with a conditioner to restore the lipid balance and keep the leather supple.

