
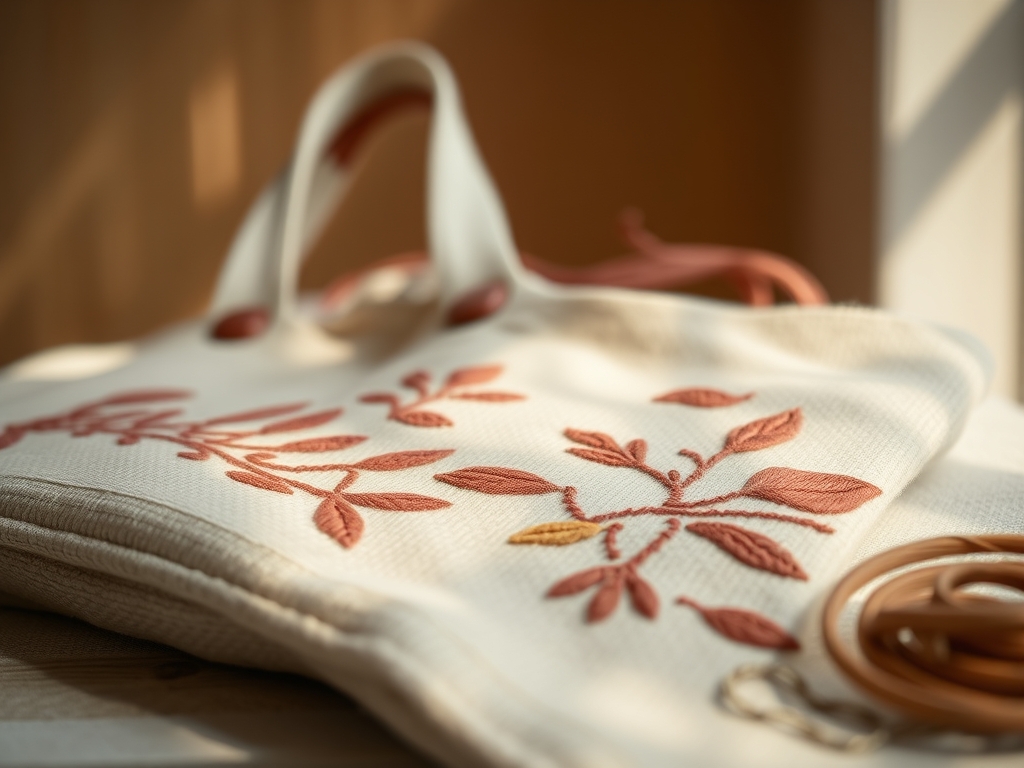
The smell of raw, unbleached cotton canvas is the first thing that hits you when you enter the studio. It is earthy and starchy; a scent that promises structural integrity and a blank slate for your wildest creative impulses. When you run your hand over the surface of high-quality Custom Embroidered Tote Bags, you are feeling the literal tensile strength of a heavy-duty 12-ounce duck canvas. It is tactile and slightly abrasive, yet it possesses a consistent grain direction that dictates how your needle will pierce the weave. We are not just making bags; we are engineering portable canvases that must withstand the physics of daily transit while looking absolutely editorial. You can feel the ply of the fabric between your thumb and forefinger, sensing the density of the fibers that will eventually hold thousands of tiny, high-tension thread locks. This is where the grit of the workshop meets the elegance of the boutique. We are about to transform a flat piece of textile into a three-dimensional masterpiece of functional art.
THE STUDIO KIT
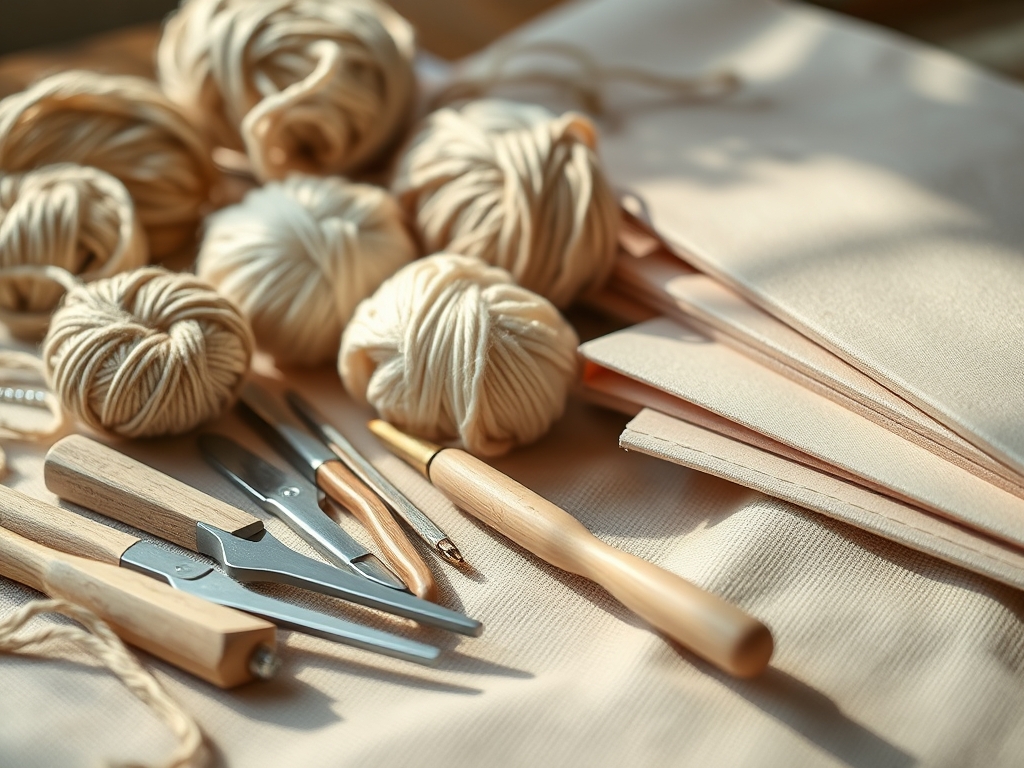
To master the production of **Custom Embroidered Tote Bags**, you need a kit that respects the physics of the medium. Your primary tool is a high-speed embroidery machine, but the manual precision tools are what define the finish. You will need a **rotary cutter** with a 45mm tungsten steel blade to ensure clean, non-frayed edges. Use a **transparent acrylic ruler** to measure the **gauge** of your margins. For the embroidery itself, 40-weight trilobal polyester thread is the industry standard because of its high **tensile strength** and resistance to chlorine bleach. You must also have a **water-soluble stabilizer** to prevent the fabric from puckering under the high-density stitch counts.
Material Substitutions: If you cannot source heavy duck canvas, a recycled PET felt offers a unique, non-fraying alternative with a high porosity that accepts thick wool threads beautifully. For a premium upgrade, swap standard cotton handles for vegetable-tanned leather straps, which you will attach using a rotary punch and solid brass rivets for maximum durability.
THE TEMPO
The "Maker's Rhythm" is a sequence of high-focus bursts followed by steady, mechanical execution. Total production time for a professional-grade layout typically spans three to four hours. The Preparation Phase takes 45 minutes; this involves stabilizing the fabric and calibrating your machine tension to match the fiber density of the canvas. The Execution Phase is the longest, lasting roughly two hours depending on the stitch density of your chosen layout. Finally, the Finishing Phase requires 30 minutes of meticulous detail work, including burnishing leather edges or heat-setting the embroidery to ensure the fibers lock into place. Respecting this tempo prevents "maker's fatigue," ensuring every bag leaves the studio with zero structural defects.
THE CORE METHOD
1. The Centered Monogram Masterpiece
The most classic layout involves a high-impact central focal point. Use your calipers to find the exact geometric center of the bag face, marking it with a disappearing ink pen. This layout relies on symmetry to create a sense of balance. You must hoop the fabric tightly to ensure the warp and weft of the canvas are perfectly perpendicular.
Mastery Tip: Understand surface tension. If the fabric is too loose in the hoop, the needle strikes will cause the fabric to "flag" or bounce, leading to misaligned stitches and bird-nesting on the bobbin side.
2. The Bottom-Third Landscape
This layout places the embroidery in the lower horizontal third of the bag. It is visually grounding and works exceptionally well for botanical or architectural designs. By shifting the weight of the thread to the bottom, you create a lower center of gravity for the visual design, which feels more organic to the human eye.
Mastery Tip: Account for structural integrity. Avoid placing high-density fills too close to the bottom seam, as the needle perforations can weaken the canvas at a high-stress load point.
3. The Vertical Column Alignment
Running a design vertically along the left or right edge creates a modern, asymmetrical aesthetic. This layout requires a long-arm hoop to accommodate the height. Use a bone folder to crisp the side seams before hooping, ensuring the design runs perfectly parallel to the bag's edge.
Mastery Tip: Watch for capillary action when using marking pens on porous canvas. Test your ink on a scrap piece to ensure it does not bleed into the embroidery thread fibers, which can permanently stain the design.
4. The Scattered Allover Pattern
This involves repeating small icons across the entire surface. It requires multiple "re-hoopings," making it the most technically demanding layout. You must use registration marks to ensure the spacing remains consistent across the 3D plane of the bag.
Mastery Tip: Manage the stitch displacement. As you add thousands of stitches, the fabric naturally shrinks slightly. You must compensate by digitizing your design with a slight "pull compensation" to keep the icons from distorting.
5. The Wrap-Around Corner Detail
This layout starts on the front face and "wraps" around the side gusset. It creates a high-end, bespoke look that is rarely seen in mass-market products. You will need to unpick the side seam, embroider the flat panel, and then re-sew the seam using a heavy-duty denim needle.
Mastery Tip: This layout tests the shear strength of your thread. Use a reinforced backstitch at the seam junction to ensure the embroidery does not unravel when the bag is stuffed to capacity.
THE TECHNICAL LEDGER
Maintenance & Longevity: To keep your Custom Embroidered Tote Bags in gallery condition, never machine wash them on a hot cycle. The heat can cause the polyester thread and cotton canvas to shrink at different rates, leading to permanent warping. Spot clean with a pH-neutral detergent and a soft-bristled brush.
Material Variations:
- Sustainable: Organic hemp canvas offers superior tensile strength and natural antimicrobial properties.
- Premium: Waxed canvas provides a water-resistant barrier but requires a silicone-coated needle to prevent gumming up the machine.
The Correction:
- Puckering: Usually caused by insufficient stabilizer. The Fix: Add a layer of "heavy-weight tear-away" underneath the existing hoop.
- Thread Breaks: Often due to a burr on the needle or high friction. The Fix: Change to a topstitch needle with a larger eye to reduce heat.
- Misalignment: Caused by the hoop slipping. The Fix: Use hoop tape or a rubberized gasket to increase the grip on the fabric.
Studio Organization: Store your canvas rolls horizontally on a rack to prevent "crush marks" on the bottom edges. Keep your embroidery threads in a UV-protected cabinet to prevent the colors from fading and the fibers from becoming brittle over time.
THE FINAL REVEAL
There is a specific magic that happens when you pull that finished bag off the machine and snip the last jump thread. The weight of the Custom Embroidered Tote Bags has changed; it feels substantial, professional, and undeniably chic. The way the light catches the trilobal polyester thread creates a lustrous contrast against the matte, rugged canvas. You have successfully navigated the physics of tension, density, and structural design to create something that is both a workhorse and a work of art. Your market stall is going to look like a high-end boutique with these layouts on display. Go ahead, give the fabric a snap; that sound of tight, high-quality canvas is the sound of a job well done.
STUDIO QUESTIONS
What is the best fabric weight for custom embroidered tote bags?
A 12-ounce or 14-ounce cotton duck canvas is ideal. This weight provides the necessary tensile strength to support high-density embroidery without sagging, while remaining thin enough for standard home and semi-professional embroidery needles to penetrate without breaking.
How do I prevent the embroidery from puckering on the canvas?
Puckering is prevented by using the correct stabilizer and maintaining proper hoop tension. Always use a cut-away stabilizer for heavy designs and ensure the canvas is "drum-tight" in the hoop to counteract the pull of the embroidery threads.
Can I embroider on both sides of the tote bag?
Yes, but you must ensure the bag is turned inside out or use a "free-arm" machine. Careful alignment is required to ensure the designs on both sides are level, maintaining the bag's structural balance and visual symmetry.
Which needle size should I use for heavy canvas bags?
Use a 90/14 or 100/16 sharp point needle. These larger sizes are designed to pierce thick, tightly woven fibers without bending, ensuring the thread passes through the canvas smoothly and reducing the risk of friction-induced thread breaks.

