
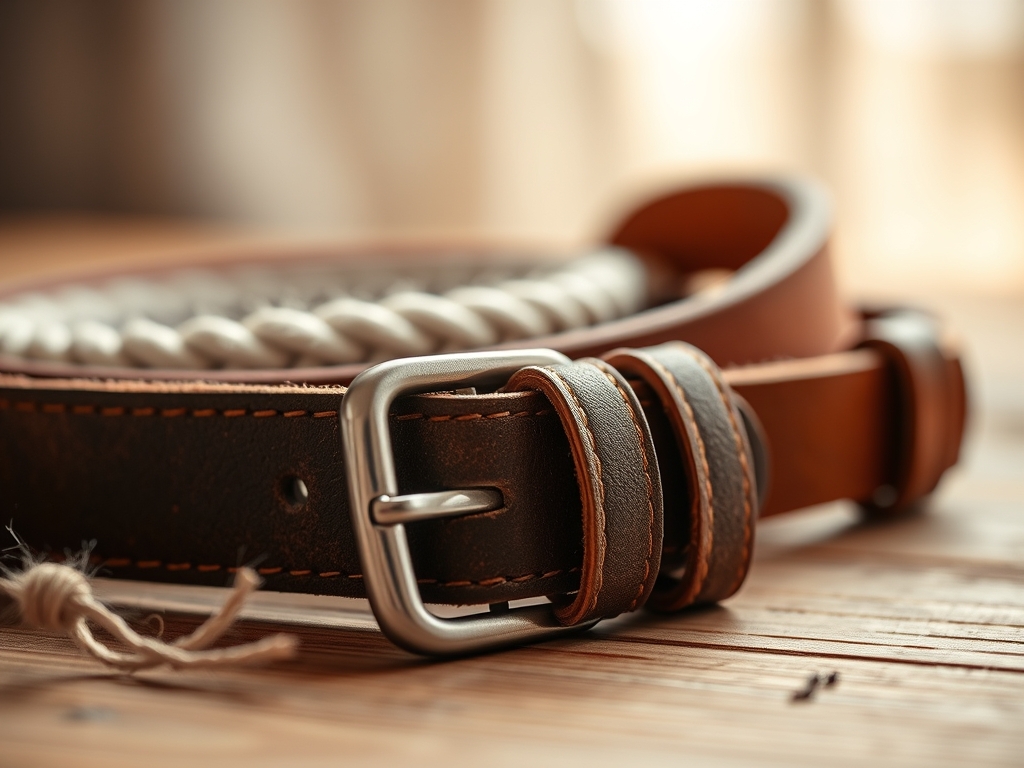
The scent of high quality vegetable tanned hide is a drug; it is a mix of earthy tannins and deep, fatty oils that linger on your fingertips long after the first cut. When you are hunting for the perfect Custom Leather Belt Gifts, you are not just buying a strip of cowhide. You are selecting a legacy piece that will undergo thousands of cycles of mechanical stress. A father figure deserves a belt that respects the physics of tension. Think about the way a belt must resist elongation while remaining supple enough to contour to the waist. We are looking for high tensile strength and a tight grain structure that will not crack under pressure. This is about the tactile joy of a heavy, nine ounce shoulder cut that feels substantial in the hand. It is cold, firm, and ready to be transformed through heat and friction. We are about to dive into the chemistry of dyes and the physics of burnishing to create something truly rugged.
THE STUDIO KIT
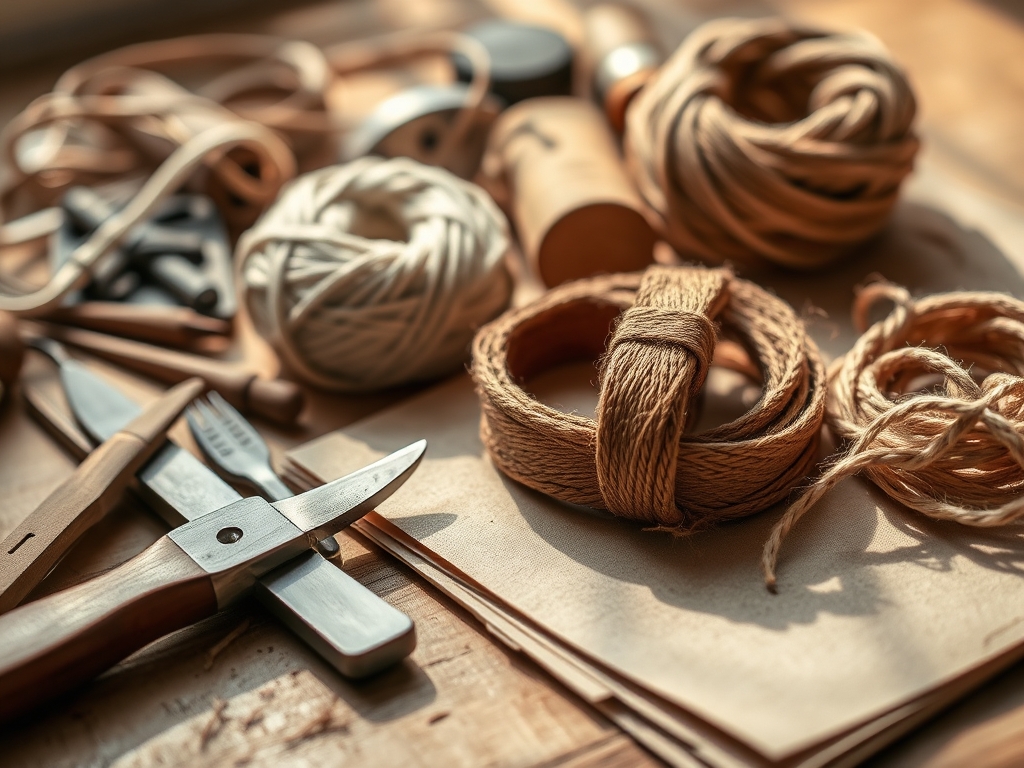
To execute these finishes, your workbench needs more than just a sharp blade. You need a rotary cutter for long, straight tracks and a set of digital calipers to ensure your strap thickness is uniform to within a tenth of a millimeter. For the edges, a bone folder and a series of edge bevelers (sizes 0 through 3) are non negotiable. You will also need gum tragacanth, a natural binding agent that smooths down the stray protein fibers on the flesh side of the leather. If you cannot find gum tragacanth, a beeswax and paraffin blend serves as a suitable material substitution for creating a water resistant seal. Do not forget a stitching pony to hold the workpiece steady; it acts as a third hand, allowing you to maintain consistent tension on your waxed polyester thread.
THE TEMPO
The "Maker's Rhythm" is a balance between aggressive physical labor and patient chemical drying. You cannot rush the capillary action of a deep oil finish. Expect to spend about forty minutes on the initial "Rough Cut and Bevel" phase. The "Dye and Cure" phase takes the longest; while the application is quick, the solvents must evaporate fully over six to eight hours to prevent bleeding. The "Burnish and Buff" phase is where you find your flow state. It requires a high frequency, repetitive motion for about thirty minutes per edge to achieve a glass like surface. Total active bench time is roughly three hours, but the project spans a full twenty four hour cycle to allow the fibers to settle.
THE CORE METHOD
1. The Weathered Oak Patina
This finish mimics the natural oxidation of wood. Start by applying a light coat of Neatsfoot oil to hydrate the porous collagen fibers. Once the oil has penetrated the dermis, apply a walnut based dye using a circular motion.
Mastery Tip: This technique relies on differential absorption. By oiling the leather first, you create "resist" areas that prevent the dye from over saturating the grain, resulting in a variegated, natural look rather than a flat, painted appearance.
2. The High Friction Glass Edge
A rugged belt is defined by its edges. Use your edge beveler to remove the 90 degree corners, then apply a thin layer of water. Friction is your tool here; use a wooden slicker to rub the edge until it generates heat.
Mastery Tip: The science here is thermal burnishing. The heat generated by friction melts the natural waxes and lignins within the leather fibers, fusing them into a solid, plasticized surface that prevents moisture ingress and fraying.
3. The Distressed Gunmetal Wash
For a father who prefers a tactical aesthetic, use a black spirit dye thinned with denatured alcohol. After the dye dries, use a fine 400 grit sandpaper to lightly scuff the high points of the grain.
Mastery Tip: This creates mechanical abrasion that exposes the lighter "crust" of the leather beneath the dye. It simulates years of wear in minutes, providing a rugged, matte texture that hides future scratches.
4. The Waxed Flesh Ruggedization
Turn the belt over and focus on the "flesh" side. Apply a heavy coat of carnauba wax and use an oscillating tool with a felt pad to drive the wax deep into the loose fiber network.
Mastery Tip: This increases the hydrophobic properties of the belt. By saturating the loose protein fibers with hard wax, you prevent sweat and body oils from migrating through the leather, which would otherwise cause the material to soften and lose its structural integrity.
5. The Sun-Bleached Saddle Tan
If you start with "natural" veg tan, you can use UV radiation to your advantage. Place the strap in direct sunlight for four hours before applying any oils.
Mastery Tip: This is photo-oxidation. The UV rays react with the vegetable tannins (like mimosa or quebracho) trapped in the fibers, darkening them naturally. This creates a base "tan" that is chemically bonded to the fiber, ensuring the color never peels or flakes.
6. The Marbled Oil Pull-Up
Apply a generous amount of heated tallow or heavy oil to the grain side. Once saturated, fold and "work" the leather vigorously with your hands.
Mastery Tip: This demonstrates the displacement of lipids. When the leather is bent, the oils are pushed away from the pressure point, creating a temporary light streak. This "pull up" effect is the hallmark of premium, rugged leather that tells a story with every movement.
THE TECHNICAL LEDGER
Maintenance & Longevity: To keep these Custom Leather Belt Gifts in peak condition, they should be wiped with a damp cloth and treated with a wax based conditioner every six months. Avoid silicone based sprays, as they clog the pores and prevent the leather from "breathing," which eventually leads to fiber rot.
Material Variations: While traditional cowhide is the standard, Hermann Oak or Wickett & Craig leathers are the premium choice for their high tannin density. For a sustainable alternative, look for "reclaimed" harness leather, which has already been compressed by years of use, offering incredible stability.
The Correction:
- The Bleed: If dye is rubbing off, the surface is over saturated. Fix: Wipe vigorously with a soft cloth dipped in a "deglazer" or isopropyl alcohol to remove excess pigment, then reseal.
- The Crack: If the grain cracks when bent, the leather is dehydrated. Fix: Apply multiple light coats of pure Neatsfoot oil over 48 hours to restore elasticity to the fibril bundles.
- The Wonky Hole: If buckle holes are stretching, the "pitch" is too small. Fix: Use a reinforcement backing of non stretch polyester tape on the interior of the belt before stitching.
Studio Organization: Store your leather straps flat or in large diameter coils (at least 12 inches). Storing them in tight rolls causes compression set, where the fibers on the grain side permanently deform, leading to unsightly wrinkling.
THE FINAL REVEAL
There is nothing quite like the moment you buckle that finished strap. It has a weight and a "snap" that commercial belts simply cannot replicate. The edges are as smooth as glass; the color has a depth that seems to glow from within the grain. When you hand over one of these Custom Leather Belt Gifts, you are giving a tool that will outlast its owner. It is a piece of engineered art that balances the raw strength of the hide with the refined precision of your craft. It feels rugged, it looks expensive, and it smells like a professional studio.
STUDIO QUESTIONS
How do I choose the right belt thickness?
For rugged use, aim for 9 to 10 ounces (approx. 3.6 to 4.0 mm). This thickness provides the necessary tensile strength to support tools or holsters without sagging, while still fitting through standard denim belt loops.
What is the best way to prevent dye transfer?
Always use a resolene or acrylic finisher to seal the dye. Apply it in thin, even coats and allow it to cure for a full 24 hours. Buffing the leather with a clean rag until no color remains is essential.
Can I use a regular drill for belt holes?
No, a drill tears the fibers. Use a rotary punch or a drive punch with a poly mallet. A clean, sheared hole distributes mechanical stress evenly, whereas a jagged drill hole will eventually tear under the buckle's pressure.
Why does my leather feel stiff after dyeing?
Dyes are often alcohol based, which dehydrates the leather. You must "re-fat" the material by applying a light coat of oil or conditioner after the dye has dried to restore the inter-fiber lubrication and flexibility.

