
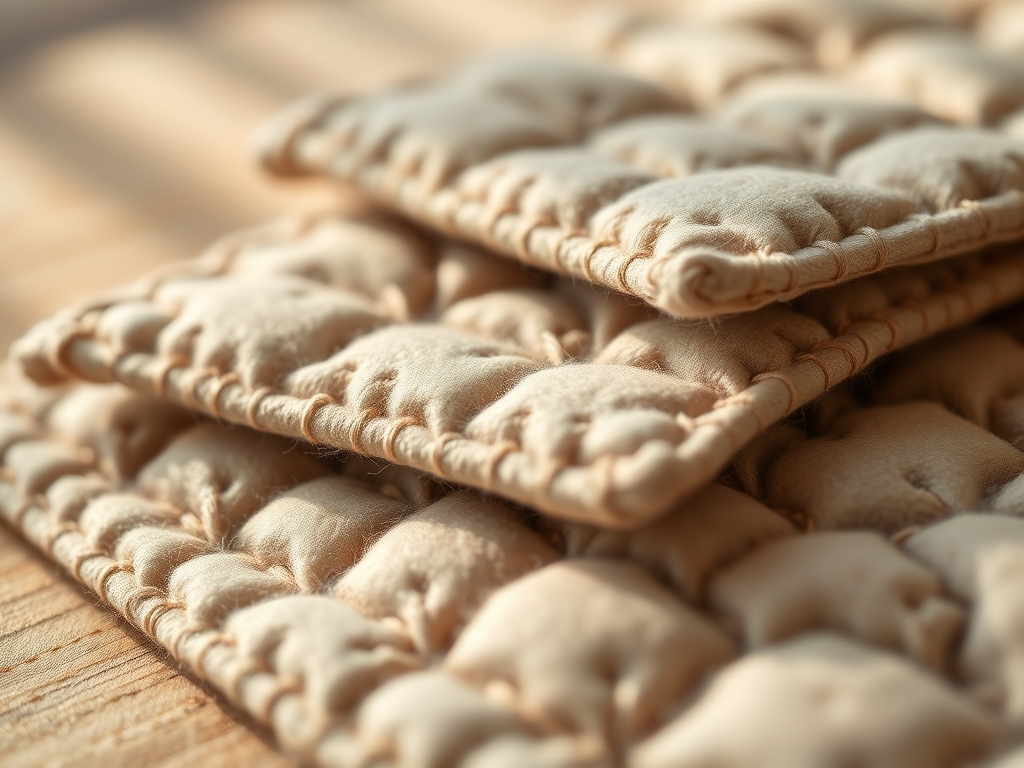
The crisp snap of high thread count cotton against your fingertips is the first sign that you are about to create something monumental. When you handle fabric intended for Hand Stitched Quilting Squares, you are not just touching cloth; you are engaging with a matrix of interlaced fibers designed to withstand decades of tension. The tactile resistance of a tight weave tells you exactly how much drag your needle will face. As we prep for this group project, we are looking for that perfect balance of porosity and structural integrity. You want a textile that breathes but refuses to fray under the constant friction of a running stitch. This is where the physics of the craft meets the soul of the maker. We are building a collective heirloom, one square at a time, ensuring that the tensile strength of our thread matches the ambition of our design. Grab your favorite thimble and feel the weight of the shears in your hand. It is time to transform raw yardage into a geometric masterpiece.
THE STUDIO KIT
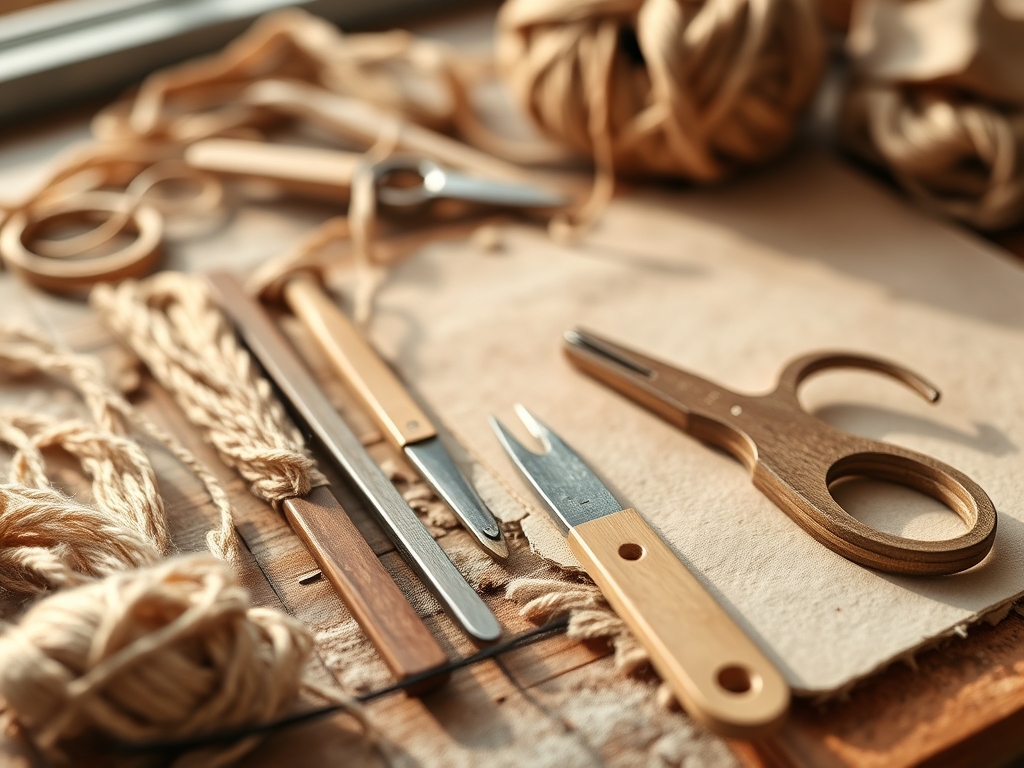
To achieve professional results, your toolkit must be calibrated for precision. We start with a rotary cutter equipped with a 45mm tungsten steel blade to ensure clean, microscopic edges that prevent thread migration. You will need a self healing cutting mat with a high density core to absorb the blade's pressure without dulling the edge. For the stitching itself, select between needles (size 10 or 12) because their shorter length reduces the arc of your hand movement, allowing for a faster, more consistent cadence.
The thread is your structural adhesive. Opt for a 50-weight mercerized cotton; the mercerization process removes stray fuzz and increases the luster and tensile strength of the fiber. You will also need a bone folder to burnish your seams, ensuring they lay perfectly flat without the heat distortion that irons can sometimes cause on delicate dyes.
Material Substitutions: If high end quilting cotton is unavailable, look for vintage linen with a consistent warp and weft. Avoid synthetic blends that lack "memory," as they will not hold a crisp crease. If you lack a rotary cutter, a pair of offset tailor shears will suffice, provided you mark your lines with a fine gauge silver marking pencil to maintain geometric accuracy.
THE TEMPO
The rhythm of hand stitching is a physiological state known as "flow," but it is governed by a strict timeline. For a group project, consistency is key. Expect the Preparation Phase (measuring, cutting, and sorting by grain direction) to take approximately two hours for a set of twenty squares. The Assembly Phase, where the individual block patterns are pieced together, requires roughly ninety minutes per square for a seasoned maker.
The Maker's Rhythm is the synchronization of your breath with the needle's entry and exit points. This is not just poetic; it stabilizes your fine motor skills. As you settle into the work, your "stitches per inch" (SPI) should stabilize. Aim for 8 to 10 SPI for structural seams. The total project duration for a group of five people, aiming for a queen size finish, typically spans forty to sixty studio hours.
THE CORE METHOD
1. Calibrating the Grain
Before the first cut, you must identify the straight of grain. This runs parallel to the selvage and has the least amount of stretch. Aligning your patterns with the grain prevents the finished quilt from warping or "torquing" over time.
Mastery Tip: This involves the science of elastic deformation. If you cut on the bias (the 45 degree angle), the fabric becomes highly unstable. By staying true to the grain, you ensure the square maintains its dimensions under the weight of the batting.
2. The Precision Seam Allowance
Mark a consistent quarter inch seam allowance on the reverse side of every piece. Use a clear acrylic ruler to ensure the lines are perfectly perpendicular. In a group project, a variation of even a millimeter can lead to a cumulative error that ruins the final alignment.
Mastery Tip: Use the concept of tolerance levels. In engineering, the tolerance is the allowable limit of variation. In quilting, keeping your tolerance below 0.5mm ensures that the corners of your geometric patterns will "kiss" perfectly when joined.
3. The Loading Technique
Load three to four stitches onto your needle before pulling the thread through. This "rocking motion" uses the needle as a lever, reducing the strain on your carpal tunnel and increasing the speed of the stitch.
Mastery Tip: This utilizes mechanical advantage. By using the needle as a pivot point against your thimble, you distribute the force across the palm of your hand rather than just your fingertips, preventing fatigue and maintaining high stitch density.
4. Managing Thread Tension
As you pull the thread through, avoid "cinching." The thread should sit flush against the fabric without puckering it. If the fabric bunches, your tension is too high; if the loops are visible, it is too low.
Mastery Tip: This is a study in capillary action and friction. The thread must occupy the space between the fibers without displacing them. Proper tension allows the fibers to "settle" around the thread, locking it into place through natural friction.
5. The Nested Seam
When joining two completed squares, "nest" your seams by pressing the allowances in opposite directions. This reduces bulk at the intersections and allows the needle to pass through fewer layers of fabric.
Mastery Tip: By reducing the cross sectional density at the corners, you prevent needle deflection. This ensures that your hand stitching remains straight even when navigating the thickest parts of the quilt top.
6. Burnishing the Edges
Once a square is finished, use a bone folder or a heavy tailor's clapper to flatten the seams. This mechanical pressure sets the fibers without the risk of scorching or "shining" the fabric with an iron.
Mastery Tip: This process uses compression set to permanently realign the fibers at the fold. It creates a crisp, professional edge that makes the subsequent quilting process much smoother.
7. The Final Inspection
Hold your square up to a light source to check for "holidays" or missed stitches. Ensure that all knots are buried within the seam allowance to prevent them from creating lumps during the final assembly.
Mastery Tip: This is a quality assurance step. Checking for light penetration allows you to see the structural integrity of the seam. A solid seam will show a consistent, dark line where the fabrics overlap.
THE TECHNICAL LEDGER
Maintenance & Longevity: To preserve the Hand Stitched Quilting Squares, avoid harsh detergents. Use a pH neutral soap to prevent the breakdown of natural cotton cellulose. Store the finished blocks in a breathable cotton muslin bag to prevent "acid migration" from cardboard boxes.
Material Variations: For a sustainable approach, utilize recycled hemp or bamboo silk, though be aware that hemp has a higher abrasion resistance and may require a sturdier needle. Premium projects might incorporate long staple Egyptian cotton, which offers superior tensile strength and a silk like hand feel.
The Correction:
- The Pucker: If the fabric bunches, use an awl to gently redistribute the thread tension across the seam.
- The Fray: If an edge begins to unravel, apply a microscopic amount of archival quality fray check to the edge to stabilize the weave.
- The Misalignment: If corners do not match, use a seam ripper to open only the last inch of the seam and "ease" the fabric back into place using fine pins.
Studio Organization: Organize your squares by "lot number" or color value. Use acid free dividers to keep sets separate. This prevents the transfer of dyes (crocking) between high contrast fabrics like deep reds and whites.
THE FINAL REVEAL
There is nothing quite like the moment a group project comes together. When those individual Hand Stitched Quilting Squares are laid out on the studio floor, the collective energy is palpable. You can see the slight, beautiful variations in each maker's hand, yet the geometric precision binds them into a singular, cohesive vision. The weight of the fabric, the repetitive beauty of the stitches, and the vibrant colors create a sensory experience that machine quilting simply cannot replicate. It is a testament to patience, physics, and the power of the handmade.
STUDIO QUESTIONS
What is the best thread for hand quilting?
Use 50-weight mercerized cotton. It offers high tensile strength and a smooth finish that reduces friction. This prevents the thread from fraying as it passes through the fabric repeatedly, ensuring the structural integrity of your Hand Stitched Quilting Squares.
How do I prevent my hand from cramping?
Maintain an ergonomic grip and use a thimble. Employ the "rocking motion" to utilize mechanical advantage rather than pinching the needle. This distributes the physical load across your hand muscles, allowing for longer, more comfortable stitching sessions.
Can I mix different fabric weights?
It is not recommended. Different weights have varying shrinkage rates and tensile strengths. Mixing a heavy canvas with a light lawn will cause the seams to pull and pucker over time, compromising the quilt's overall balance and longevity.
Why are my stitches uneven?
Uneven stitches usually result from inconsistent thread tension or a lack of a "rhythm." Practice loading the same number of stitches onto the needle each time. This creates a mechanical muscle memory that standardizes the stitch length and spacing.
How should I store unfinished squares?
Store them flat in a dark, cool environment using acid-free containers. Avoid folding them, as permanent creases can weaken the fiber structure. Keeping them away from UV light prevents "photo-degradation," which fades dyes and embrittles the cotton fibers.

