

Grab your heavy duty thimble and clear the floor because we are about to transform a flat bolt of cotton duck into a structural masterpiece. There is a specific, grounding weight to a heavy canvas that feels like pure potential. When you run your thumb across the weave, you can feel the high thread count resisting your touch; it is a tactile promise of durability. We are diving deep into the world of Hand Stitched Canvas Tents today. This is not about flimsy polyester or plastic poles that snap under the slightest pressure. We are talking about architectural play spaces that utilize tensile strength and the geometric perfection of the triangle to create a sanctuary. Your playroom is about to get a serious upgrade in both aesthetics and physics. As we pull the waxed thread through the fibers, you will feel the friction heat up the needle. That heat is the sound of a permanent bond forming. We are building memories, yes, but we are building them with the structural integrity of a high seas sail.
THE STUDIO KIT
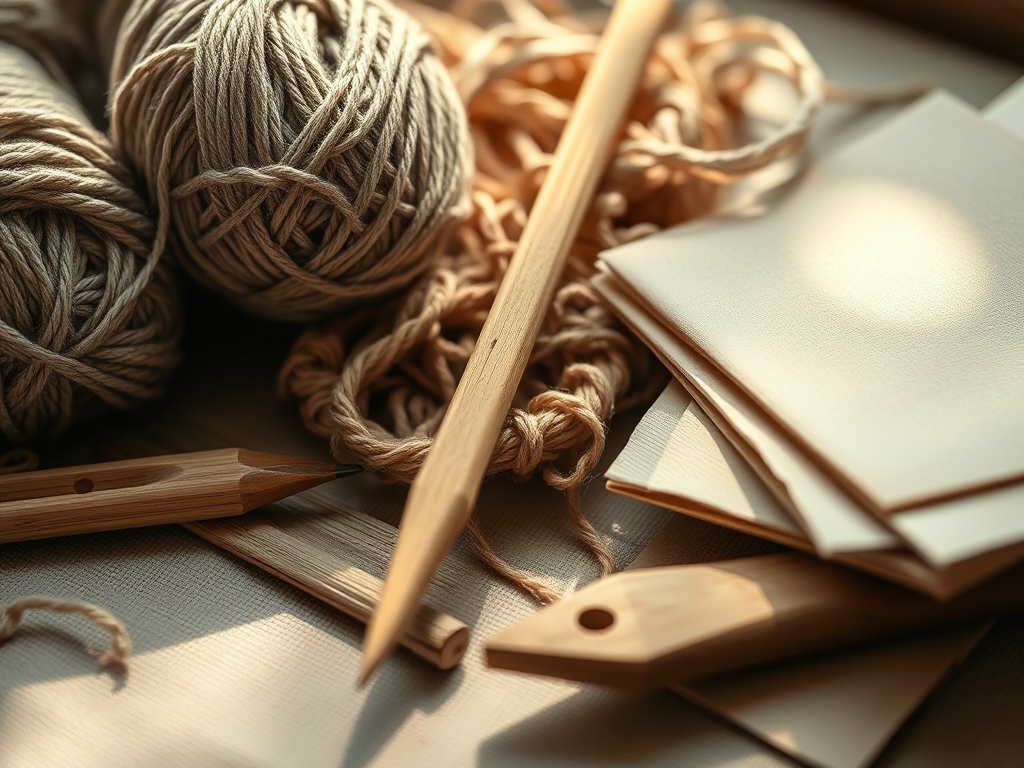
To execute these Hand Stitched Canvas Tents with professional precision, your toolkit must prioritize mechanical advantage. You will need a rotary cutter with a 45mm tungsten steel blade to ensure clean, non-frayed edges on your 12-ounce canvas. Unlike scissors, which crush the fibers as they cut, a rotary cutter maintains the orthogonal alignment of the warp and weft. You will also require a stitching awl to pre-punch holes through multiple layers of fabric. This prevents hand fatigue and ensures your stitches are perfectly spaced. For the thread, select a 4-ply waxed linen thread. The wax acts as a lubricant during the pass-through and then serves as a sealant, locking the stitch in place via mechanical friction.
Material Substitutions: If you cannot source 12-ounce cotton duck, you may substitute with a heavyweight linen or a recycled sailcloth. Avoid synthetic blends, as they lack the breathability and hygroscopic properties of natural fibers, which can lead to heat buildup inside the tent. For the frame, use 1-inch diameter beechwood dowels for their high density and resistance to splintering under lateral stress.
THE TEMPO
The "Maker's Rhythm" is a psychological state where the repetitive motion of the needle matches your heart rate. Creating a single tent requires approximately 12 to 15 hours of active labor. The first phase, pattern drafting and calibration, takes about 2 hours. This is where you calculate the isosceles angles to ensure the tent sits flush against the floor. The cutting phase is a swift 45-minute sprint of precision. The bulk of your time, roughly 10 hours, is dedicated to the hand stitching. Do not rush this. The load-bearing seams require a consistent tension; if you pull too hard, the canvas will pucker. If you leave it too loose, the structure will sag. Finally, allow 1 hour for the burnishing of the wood and final assembly.
THE CORE METHOD
1. Geometric Drafting and Grain Alignment
Begin by laying your canvas flat on a cutting mat. You must align your pattern pieces with the longitudinal grain of the fabric. This ensures that the weight of the tent pulls against the strongest fibers, minimizing stretching over time. Use a chalk liner to mark your triangles.
Mastery Tip: Always account for the selvage edge. The selvage is the factory-finished edge that prevents unraveling. By incorporating the selvage into your door flaps, you reduce the need for hemming and maintain the structural stability of the opening.
2. The Awl and Punch Technique
Before you thread your needle, use your stitching awl to create a path. Space your holes exactly 5mm apart. This creates a uniform distribution of stress across the seam. If holes are too close, the fabric may tear like a perforated sheet of paper; too far apart, and the seam will gape.
Mastery Tip: This process utilizes displacement physics. The awl does not cut the fibers but pushes them aside. This maintains the tensile integrity of the canvas because the fibers remain continuous around the hole.
3. The Saddle Stitch Execution
Thread two needles on opposite ends of a single length of waxed linen. Pass both needles through the same hole from opposite directions. This creates a locking mechanism that is far superior to a machine lockstitch. If one thread breaks, the other will hold the seam together.
Mastery Tip: Maintain consistent tension by pulling both threads outward with equal force. This centers the "knot" inside the fabric, utilizing capillary action to pull the wax into the fibers for a water-resistant seal.
4. Reinforcing the Apex
The point where the wooden dowels meet the canvas is the high-stress focal point. You must stitch a secondary layer of canvas, known as a gusset, into the interior of the apex. This doubles the thickness and prevents the poles from "poking through" due to localized pressure.
Mastery Tip: Use a cross-stitch pattern on the gusset. This distributes the downward force of the poles across a larger surface area, preventing material fatigue.
5. Tensioning the Base
The final step is creating the floor loops. These loops anchor the canvas to the dowels. Use a heavy-gauge cotton webbing for these loops. Hand stitch them using a "box-X" pattern for maximum security.
Mastery Tip: Ensure the loops are slightly smaller than the dowel diameter. This creates elastic deformation in the webbing, providing a snug fit that prevents the tent from sliding up the poles during play.
THE TECHNICAL LEDGER
Maintenance & Longevity
To maintain your Hand Stitched Canvas Tents, perform a dry brush cleaning once a month to remove particulates from the weave. If a spill occurs, use a pH-neutral soap and spot clean. Never machine wash the tent, as the agitation cycle will degrade the hand-stitched tension and cause the natural fibers to shrink unevenly.
Material Variations
- Sustainable: Organic hemp canvas offers superior antimicrobial properties.
- Recycled: Repurposed military surplus canvas provides a pre-weathered patina and extreme durability.
- Premium: Belgian linen offers a refined drape and high luster for a luxury playroom aesthetic.
The Correction: 3 Common Mistakes
- The Sagging Ridge: Caused by uneven tension during the saddle stitch. Fix: Use a bone folder to flatten the seam and redistribute the thread tension manually.
- Thread Fraying: Occurs when the thread is too long, causing it to rub against the canvas too many times. Fix: Keep your thread lengths under 36 inches and re-wax frequently.
- Pole Slippage: Caused by using smooth, finished wood. Fix: Use a rasp or sandpaper to roughen the area of the dowel where the canvas loops sit, increasing kinetic friction.
Studio Organization
Store your canvas rolls vertically to prevent permanent creasing or "pressure flatting" of the fibers. Keep your needles in a magnetized tray and store your waxed thread in a cool, dark place to prevent the wax from melting or becoming brittle.
THE FINAL REVEAL
Look at that silhouette! The way the light filters through the porous cotton fibers creates a soft, ethereal glow inside the tent. Your Hand Stitched Canvas Tents are no longer just projects; they are architectural feats. The heavy seams stand proud, showcasing the meticulous geometry of your labor. When a child crawls inside, the structure remains rigid and safe, a testament to your understanding of structural physics and material science. You have created a legacy piece that smells of beeswax and raw cotton, ready for a lifetime of imagination.
STUDIO QUESTIONS
What is the best canvas weight for play tents?
A 10oz to 12oz cotton duck is ideal. It provides enough tensile strength to hold its shape without being too heavy for the wooden frame to support.
Why use waxed linen thread instead of polyester?
Waxed linen has zero stretch, ensuring the tent remains taut. The wax also creates mechanical friction, which locks the stitches in place more effectively than synthetic fibers.
How do I prevent the wooden poles from sliding?
Increase the coefficient of friction by adding rubber gaskets or sanding the wood where the canvas contacts the poles. This prevents the fabric from shifting under load.
Can I make these tents waterproof for outdoor use?
Yes, you can apply a paraffin wax treatment or a fluoropolymer spray. This reduces the surface energy of the canvas, causing water to bead off rather than soaking in.
How do I stop the canvas edges from fraying?
Use a flat-felled seam or a serged edge. For hand-stitching, a tight overcast stitch creates a physical barrier that prevents the weft yarns from migrating out of the weave.

