
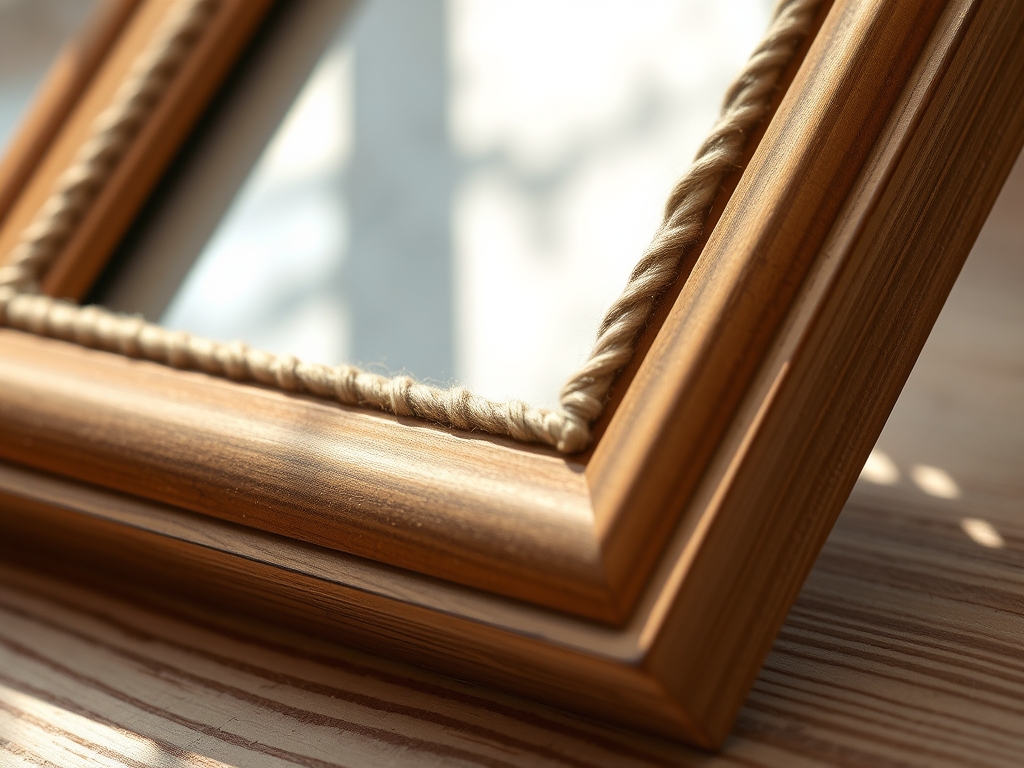
Close your eyes and imagine the scent of raw linen and the crisp, structural resistance of high-density cardstock meeting a sharp needle. We are not just making crafts; we are engineering memories. When you dive into the world of Hand Stitched Photo Frames, you are balancing the tensile strength of embroidery floss against the delicate surface tension of fabric. It is a tactile dance where every pull of the thread creates a permanent architectural bond. The nursery is a space of softness, but the decor requires a structural integrity that can withstand the test of time and curious little hands. We are going to master the physics of the stitch, ensuring that your heirloom pieces are as robust as they are beautiful. By understanding how fibers interlock and how pressure is distributed across a frame, you will move from a hobbyist to a true maker. Let us grab our kits and start building something that feels as good as it looks.
THE STUDIO KIT
THE STUDIO KIT
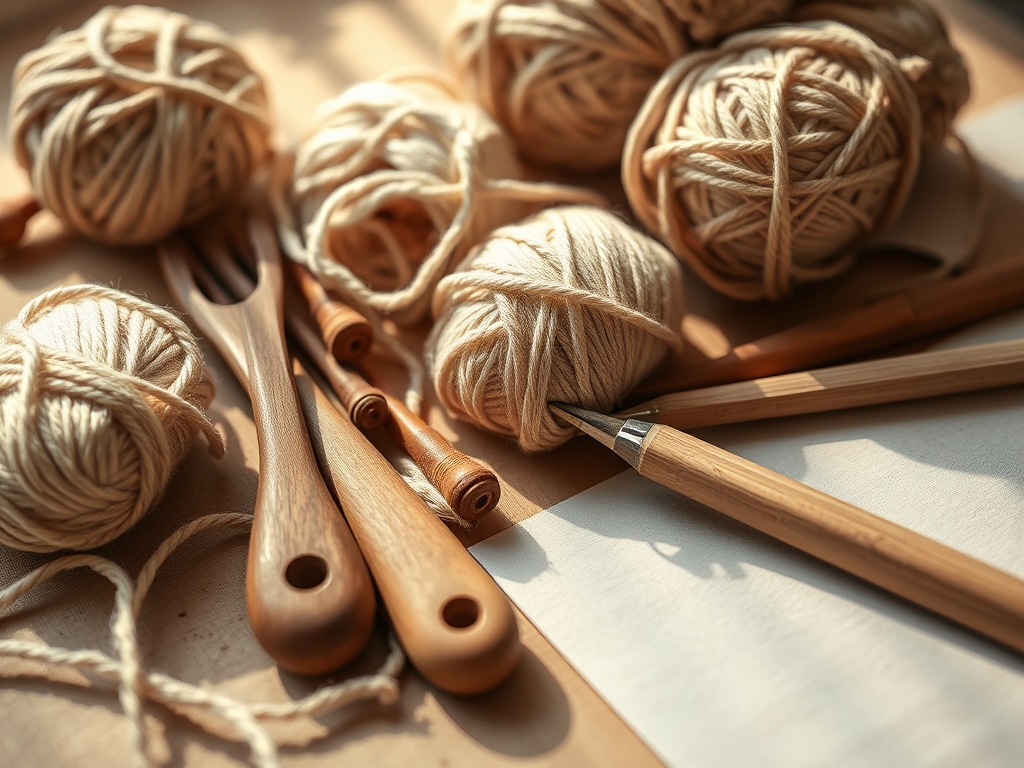
To execute these designs with precision, you need more than just a sewing kit; you need a curated selection of tools designed for material manipulation. Your primary structural component is heavyweight bookbinding board or 300gsm watercolor paper. This provides the rigid substrate necessary to prevent warping when the fabric is under tension. For the textile layer, choose organic cotton duck or high-ply linen, as these offer a stable weave that resists fraying during the piercing process.
Your toolset must include a tapered awl for pre-punching holes, which prevents the grain of the paper from shattering under the pressure of a needle. A bone folder is essential for creating crisp, ergonomic creases in your fabric wraps, ensuring the corners are mathematically square. Use a rotary cutter with a 45mm tungsten blade for clean edges that do not leave microscopic burrs on your fabric. For the stitching itself, mercerized cotton embroidery floss is the gold standard because the chemical treatment increases its luster and tensile strength, making it less likely to snap during a tight pull.
Material Substitutions: If you cannot find bookbinding board, a double layer of recycled corrugated cardboard works, provided the fluting is perpendicular for maximum rigidity. Instead of linen, you can use upcycled denim for a high-durability, high-friction alternative that grips the thread exceptionally well.
THE TEMPO
The maker's rhythm is a psychological state where the mechanical repetition of the needle becomes a form of cognitive flow. For a standard 5×7 frame, expect a total production time of approximately four hours. The Preparation Phase takes 45 minutes; this includes measuring, cutting, and the crucial step of "resting" your materials to allow them to acclimate to the humidity of your studio.
The Piercing Phase requires 30 minutes of high-focus work where you establish the geometric grid for your stitches. The Execution Phase is the longest, taking about two hours. This is where the tactile feedback of the thread moving through the substrate dictates your speed. Finally, the Assembly Phase takes 45 minutes, involving the final burnishing of edges and the setting of the backing. Do not rush the drying times if you are using adhesives; the chemical bonding process requires patience to avoid delamination.
THE CORE METHOD
1. Substrate Calibration and Mapping
Before the first stitch, you must map your grid using a precision ruler and a 2H pencil. The distance between holes determines the visual density of the design. If the holes are too close, you risk "perforation failure," where the material between the holes shears away. Aim for a minimum of 3mm between puncture points.
Mastery Tip: This involves structural integrity. By pre-punching your holes with an awl, you are displacing fibers rather than cutting them, which maintains the overall strength of the board and prevents the thread from tearing through the paper under tension.
2. Fabric Tensioning and Wrapping
Lay your fabric face down and center your board. Use your bone folder to crease the fabric over the edges. You want a "drum-tight" finish. If the fabric is too loose, the stitches will sag; if it is too tight, the board will bow.
Mastery Tip: This step utilizes friction coefficients. The way the fabric grips the edges of the board creates a mechanical bond. Using a bone folder increases the surface area contact between the adhesive and the fibers, ensuring a permanent hold.
3. The Geometric Anchor Stitch
Start your hand stitched photo frames with an anchor stitch on the backside, secured with a flat knot. Use a tapestry needle to pull the floss through your pre-punched holes. The first row establishes the "grain" of your embroidery.
Mastery Tip: This is about load distribution. By starting with a consistent tension on the first row, you ensure that the subsequent layers of thread do not pull the frame out of alignment, keeping the geometry perfectly square.
4. Layering and Texture Integration
Incorporate different weights of thread to create 3D depth. Use a 6-strand floss for bold borders and a single-ply silk thread for delicate interior details. This creates a visual hierarchy that draws the eye toward the photograph.
Mastery Tip: This leverages capillary action and light refraction. Different thread thicknesses interact with light differently; thicker threads cast shadows that give the frame a sculptural quality, while thinner threads provide a subtle sheen.
5. Final Burnishing and Backing
Once the stitching is complete, flip the frame and use the bone folder to flatten any raised thread humps on the back. Apply a pH-neutral adhesive to the backing board and press it firmly.
Mastery Tip: This ensures longevity through chemical stability. Using pH-neutral materials prevents "acid migration," which can yellow your fabric and degrade the photograph over several years in a nursery environment.
THE TECHNICAL LEDGER
Maintenance & Longevity: To keep your frames pristine, use a soft-bristled drafting brush to remove dust from the thread crevices. Avoid liquid cleaners, as the moisture can cause the paper substrate to swell and lose its shape.
Material Variations: For a premium version, use hand-dyed mulberry silk or recycled hemp cord. These materials offer unique tactile profiles and are highly sustainable for eco-conscious nursery designs.
The Correction:
- The Bowed Frame: If the board curves, your thread tension is too high. Fix this by lightly steaming the back and pressing it under a heavy weight (like a stack of art books) for 24 hours.
- Thread Fraying: If the floss splits, your needle eye is too small. Switch to a chenille needle with a larger eye to reduce friction on the thread.
- Misaligned Holes: If a hole is out of place, do not use it. Fill it with a tiny amount of acid-free wood filler, let it dry, sand it flush, and re-punch.
Studio Organization: Store your completed frames and raw materials in polypropylene bins with silica gel packets. This controls the micro-climate and prevents the organic fibers from absorbing atmospheric moisture, which leads to mold.
THE FINAL REVEAL
The finished hand stitched photo frames are a masterclass in texture and engineering. When you run your fingers across the surface, you feel the rhythmic rise and fall of the mercerized cotton against the sturdy linen backdrop. It is a piece that feels "heavy" in the best way possible; it carries the weight of intentional design and the warmth of handmade art. In the soft light of a nursery, the shadows cast by your geometric stitches add a layer of sophisticated depth that store-bought frames simply cannot replicate. You have created a structural heirloom that is ready to hold the most precious images of a new life.
STUDIO QUESTIONS
What is the best fabric for hand stitched photo frames?
High-density linen or organic cotton duck are superior because their tight weave provides the necessary tensile strength to support intricate stitching without sagging or distorting the frame's geometric shape over time.
How do I prevent the frame from warping?
Ensure you use a rigid substrate like 300gsm cardstock and pre-punch holes with an awl. This manages the distribution of tension across the board, preventing the thread from pulling the material into a curve.
Can I use regular sewing thread for this project?
Standard thread lacks the ply thickness and luster required for decorative impact. Mercerized embroidery floss is recommended for its strength and the way its polished surface resists fraying during the high-friction pass-through.
How do I clean a fabric-covered frame?
Use a compressed air canister or a soft drafting brush to dislodge dust. Never use water or chemical solvents, as these can compromise the adhesive bonds and cause the organic fibers to shrink or bleed.
Why is my needle hard to pull through?
This usually indicates a gauge mismatch. If your needle is too thick for the pre-punched hole, use a pair of jewelry pliers for extra grip, or increase the hole diameter slightly with your tapered awl.

