
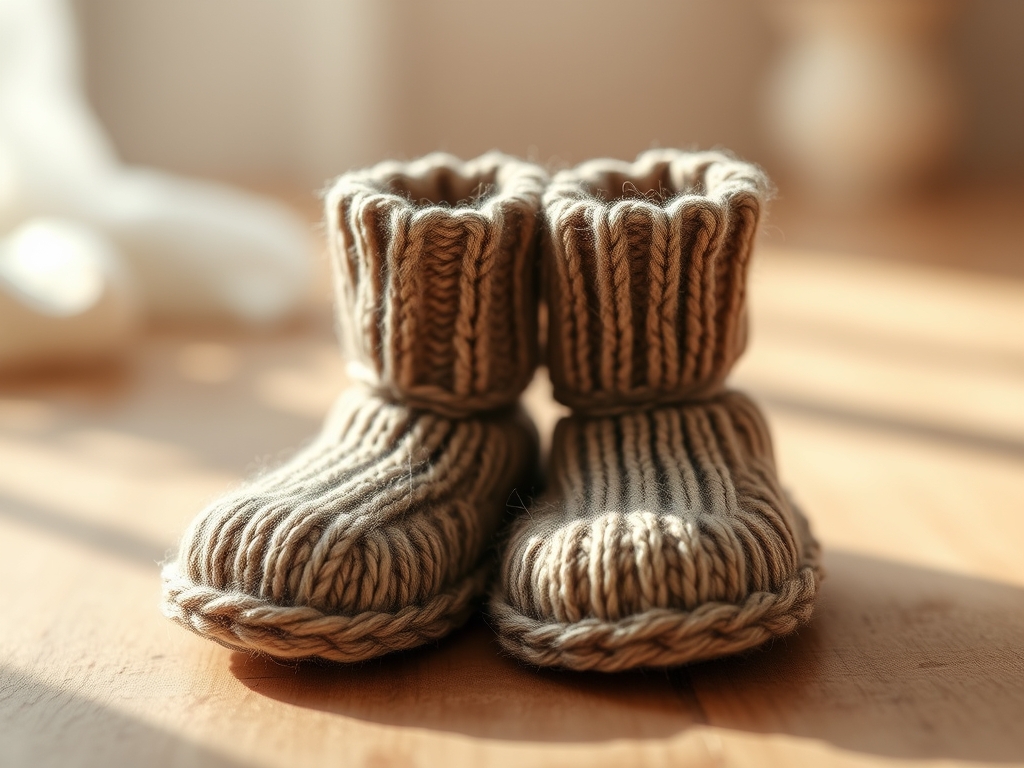
Grab your favorite mug and clear some space on the workbench because we are diving into the tactile world of fiber physics. There is nothing quite like the sensory rush of high-quality merino wool sliding through your fingers; it has a natural elasticity and a crimp that makes it the ultimate medium for tiny architecture. When you are crafting Personalized Knitted Booties, you are not just making a cute accessory; you are engineering a soft-shell structure designed to regulate thermal energy for a brand new human. The fiber density must be high enough to provide warmth but porous enough to allow for moisture wicking. We are looking for that perfect balance of tensile strength and cloud-like softness. Hospital gifts need to be more than just pretty; they must be durable enough to withstand high-heat sterilization cycles while remaining gentle on hypersensitive skin. Every loop we pull is a lesson in tension control. If we pull too tight, the fabric becomes rigid and loses its insulating loft; too loose, and the structural integrity fails. Let us get our hands on some yarn and start building.
THE STUDIO KIT
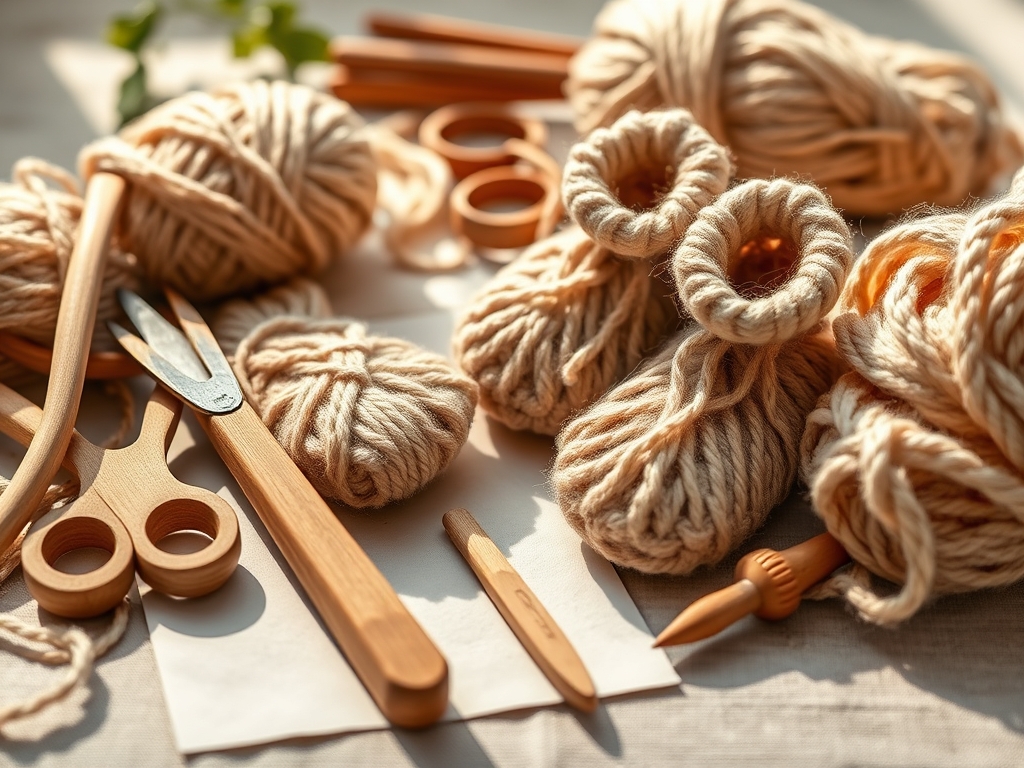
THE STUDIO KIT
To achieve professional results, you need to think like a materials scientist. Your primary tool is a set of 3.25mm stainless steel double-pointed needles. We choose steel over bamboo here because the low friction coefficient allows for faster stitch transitions, which is vital when working on such a small radius. You will also need a digital caliper to measure your gauge precisely; a fraction of a millimeter can change the final fit from a newborn size to a preemie size.
The yarn selection is critical. I recommend a four-ply superwash merino. The "four-ply" refers to the number of individual strands twisted together; more plies generally result in a rounder yarn with better stitch definition. For the personalization element, keep a blunt-tipped tapestry needle and a small amount of contrasting silk thread nearby. Silk has a high luster and incredible tensile strength, making it perfect for embroidered monograms that will not fray over time.
Material Substitutions: If merino is unavailable, look for a bamboo and cotton blend. Bamboo provides a beautiful drape and natural antimicrobial properties, while cotton offers the structural "memory" needed to keep the booties from sliding off. Avoid 100 percent acrylics for hospital gifts; they lack the breathability required for neonatal thermoregulation and can trap heat uncomfortably.
THE TEMPO
The "Maker's Rhythm" is all about finding your flow state. For a pair of Personalized Knitted Booties, you should budget approximately four hours of focused studio time. The first sixty minutes are dedicated to the Cast-On and Cuff Phase. This is the highest-concentration period where you establish the ribbing density. The middle two hours are the "Cruising Phase," where you work the foot and toe shaping. This part of the process becomes rhythmic and meditative as the muscle memory takes over.
The final hour is the "Detailing Phase." This is where we slow down to perform the Kitchener stitch for a seamless toe and execute the embroidery. Rushing this stage is a tactical error. Because the surface area is so small, every minor deviation in stitch symmetry is magnified. Think of it as a sprint followed by a marathon, then a surgical procedure.
THE CORE METHOD
1. The Long-Tail Foundation
We begin with a long-tail cast-on to ensure maximum elasticity at the ankle. Unlike a basic cable cast-on, the long-tail method creates a built-in row of knitting that distributes tension across two strands of yarn.
Mastery Tip: This technique utilizes potential energy. By maintaining consistent spacing between stitches on the needle, you ensure the cuff can expand to accommodate the infant's foot without losing its elastic memory.
2. Establishing the Ribbed Architecture
Work in a 1×1 rib (knit one, purl one) for the first two inches. This creates a corrugated fabric that functions like a mechanical spring. The alternating columns of knit and purl stitches allow the fabric to compress and expand.
Mastery Tip: Use a smaller needle size for the ribbing than for the body. This increases the stitch density, which prevents the cuff from becoming "stretched out" after repeated wear.
3. The Short-Row Heel Turn
To create the 90-degree angle required for a human foot, we use short rows. This involves turning the work before reaching the end of the row, effectively adding more fabric to one side of the tube than the other.
Mastery Tip: This is an exercise in geometric displacement. By wrapping the turning stitch, you prevent "eyelet holes" from forming, maintaining the thermal envelope of the bootie.
4. The Instep Bridge
Pick up stitches along the sides of the heel flap to connect the sole to the upper. This transition is the most common point of structural failure, so precision is mandatory.
Mastery Tip: Use a crochet hook to pull the loops through if the tension is too tight. This ensures you do not split the yarn fibers, which would compromise the burst strength of the seam.
5. The Toe Box Reduction
Decrease stitches at four points around the circumference to taper the fabric toward the toes. This creates a structural dome that mimics the anatomy of the foot.
Mastery Tip: Focus on radial symmetry. If your decreases are not perfectly aligned, the bootie will twist during wear, creating friction points against the skin.
6. The Seamless Graft
Close the toe using the Kitchener stitch. This technique mimics the path of a knitted row, creating a flat, invisible join that is completely imperceptible to the wearer.
Mastery Tip: This relies on interstitial alignment. You must keep the tension of the grafting thread identical to the tension of the knitted fabric to avoid a "ridge" that could cause pressure sores on delicate skin.
7. The Personalized Monogram
Using the duplicate stitch method, follow the path of the existing knit "V" shapes with your contrasting silk thread to form initials.
Mastery Tip: This adds a secondary layer of reinforcement. The embroidery actually increases the thickness of the fabric in that specific zone, providing extra durability where the monogram is placed.
8. The Blocking Finish
Submerge the booties in lukewarm water with a pH-neutral wool wash, then pin them into shape to dry.
Mastery Tip: This process, known as hydro-setting, allows the fibers to relax and then "lock" into their final positions. It evens out any minor tension inconsistencies and gives the piece a professional, high-end finish.
THE TECHNICAL LEDGER
Maintenance & Longevity: Because these are hospital gifts, they must be laundered frequently. Advise the recipient to use a mesh laundry bag to prevent the delicate fibers from snagging on zippers or Velcro in the wash. Always air dry to prevent the protein fibers in the wool from shrinking or "felting."
Material Variations: For a premium version, use a cashmere and silk blend. This offers the highest possible "hand feel" and thermal efficiency. For a sustainable option, look for GOTS-certified organic wool, which ensures no harmful chemicals were used during the scouring or dyeing process.
The Correction:
- The "Ladder" Effect: If you see vertical gaps between needles, tighten the second stitch on each new needle to close the gap.
- The "Tight Cast-Off": If the ankle is too tight, use a needle two sizes larger for the final row to increase the circumference.
- Split Fibers: If your needle pierces the yarn, back up and fix it immediately; a split fiber is a structural weak point that will eventually become a hole.
Studio Organization: Store your yarn in airtight polypropylene bins with cedar blocks. Natural fibers are susceptible to oxidation and pests. Keep your project in a linen drawstring bag while in progress to protect it from UV degradation and dust.
THE FINAL REVEAL
Look at that! You have officially engineered a pair of Personalized Knitted Booties that are as technically sound as they are beautiful. The stitches are uniform, the heel is perfectly contoured, and that silk monogram adds a touch of bespoke luxury that no machine could ever replicate. When you hold these, you can feel the "bounce" of the wool and the strength of the construction. They are ready to be tucked into a gift box and sent off to the hospital to welcome a new tiny human into the world. You should be incredibly proud of the physics and artistry you just combined.
STUDIO QUESTIONS
What is the best yarn weight for booties?
A "Category 1" or "Category 2" weight (Fingering or Sport) is ideal. These weights allow for a high stitch density, which provides better detail for personalization and a more comfortable, non-bulky fit for tiny feet.
How do I ensure the booties stay on?
The secret is in the ribbing tension. By using a 1×1 rib and a needle one size smaller than the main body, you create a mechanical grip that hugs the ankle without restricting blood flow.
Can I use cotton for hospital gifts?
Yes, but choose a high-quality mercerized cotton. Mercerization increases the fiber's luster and affinity for dye while reducing lint, which is important in a sterile hospital environment where airborne fibers should be minimized.
How do I fix a dropped stitch?
Use a small crochet hook to "climb" the stitch back up the ladder of horizontal threads. Ensure you do not twist the stitch as you pull it through, as this creates a visible distortion in the fabric.
Is superwash wool safe for newborns?
Absolutely. Superwash wool undergoes a treatment that removes the microscopic scales from the fiber, preventing felting and making it much smoother against the skin. It is the gold standard for easy-care baby items.

