The scent of cedarwood and cold air hits differently when your hands are buried in a mountain of raw, unspun wool. There is a specific, electric friction that occurs when steel needles meet high-twist yarn; a tactile resistance that signals the beginning of your favorite winter project. Creating Personalized Knitted Stockings is not just a holiday tradition; it is an exercise in structural engineering and fiber physics. You can feel the potential energy stored in every skein, waiting to be converted into a functional heirloom that will hang from the mantle for decades. We are looking for that perfect balance of elasticity and durability. If the fiber is too loose, the stocking sags under the weight of coal or candy; too tight, and the fabric loses its plush, inviting drape. As we prep our studio space, we are not just knitting; we are calculating the tensile strength of every loop to ensure these pieces survive the seasonal tug-of-war. Grab your favorite mug and let us get into the grit of the grain.
THE STUDIO KIT
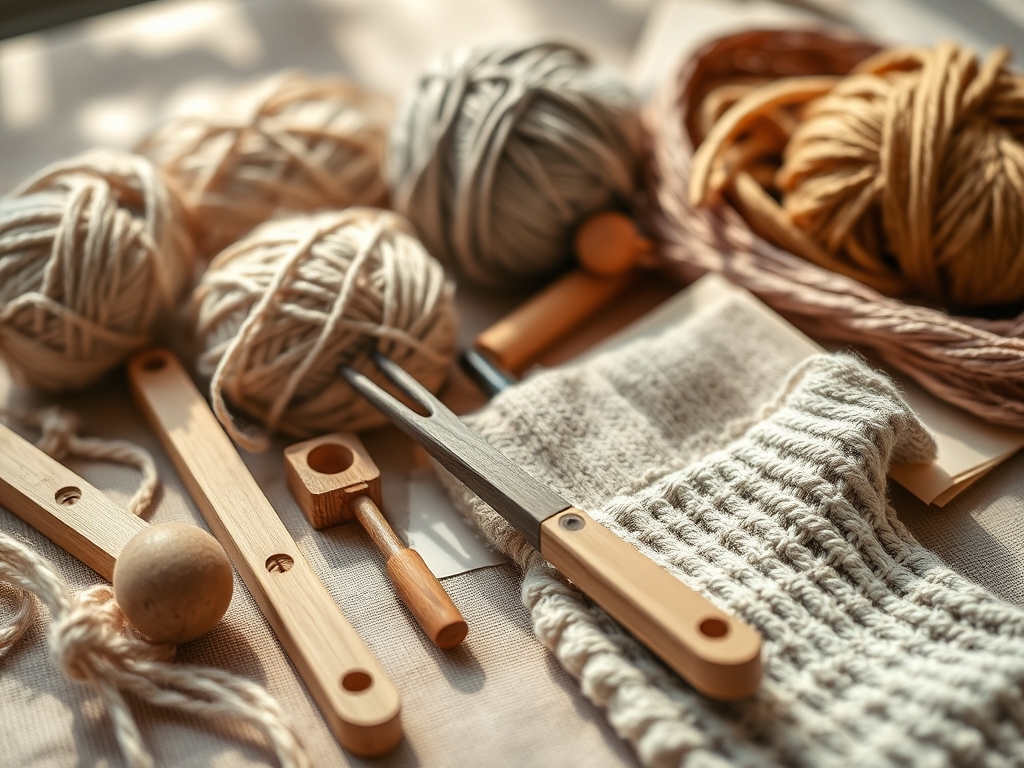
To execute these patterns with professional precision, your toolkit must go beyond basic hobbyist supplies. We start with circular needles made of surgical-grade stainless steel. Unlike bamboo, steel provides a low-friction surface that allows the yarn to glide, which is essential for maintaining a consistent gauge across large surface areas. You will also need a set of digital calipers to measure the diameter of your yarn mid-skein, ensuring that "worsted" actually means the same thickness from start to finish. For the personalization phase, keep a sharp tapestry needle and a rotating leather punch nearby; the latter is perfect for prepping sturdy leather hanging loops.
Material Substitutions: If you find pure wool too abrasive, swap it for a merino-silk blend. The silk adds a high-tensile core that prevents the "stretching" common in heavy stockings. For a more rugged, farmhouse aesthetic, a hemp-cotton mix offers incredible structural integrity, though it lacks the thermal elasticity of animal fibers. Always check the ply count; a 4-ply yarn is the gold standard for stockings because the tighter twist resists pilling when it rubs against the rough stone of a fireplace.
THE TEMPO
The "Maker's Rhythm" is a psychological state where the repetitive motion of the needles aligns with your resting heart rate. For a standard 20-inch stocking, expect a total investment of twelve to fifteen hours. The Cuff Phase (2 hours) requires high focus as you establish the ribbing that prevents the fabric from curling. The Leg and Heel Phase (6 to 8 hours) is the endurance stretch where you maintain your tension. Finally, the Personalization Phase (3 to 5 hours) is the most meticulous, involving duplicate stitch embroidery or intarsia colorwork. Do not rush the heel turn; it is the architectural keystone of the entire project.
THE CORE METHOD
1. The Foundation Ribbing
We begin with a long-tail cast-on to ensure the opening of the stocking has maximum elasticity. A 2×2 ribbing pattern creates a series of vertical channels that act like micro-springs. This allows the cuff to expand when stuffed with gifts without losing its original shape.
Mastery Tip: This is about Hooke's Law of Elasticity. By alternating knit and purl stitches, you are creating a corrugated structure that stores mechanical energy. If your ribbing is too loose, the stocking will lose its grip on the mantle.
2. The Stranded Colorwork Body
As we move into the festive patterns, we use Fair Isle techniques. This involves carrying two colors of yarn simultaneously. The "floats" on the inside of the fabric create a double-layered wall of insulation and thickness, which provides the "body" required for the stocking to hang straight.
Mastery Tip: Manage your surface tension. If you pull the floats too tight, the fabric will pucker, a phenomenon known as "drawing in." Keep your floats loose enough to allow the knitted fabric to reach its full lateral expansion.
3. The Short-Row Heel Turn
The heel is where the physics gets interesting. We use short-rows to create a 3D cup shape out of a 2D plane of fabric. By wrapping and turning stitches, you redirect the grain of the knitting by ninety degrees without creating a seam that could fail under pressure.
Mastery Tip: This transition relies on structural geometry. The "wrap and turn" prevents holes by filling the gap created when you change direction. Think of it as a gusset in a bridge; it redistributes the weight of the contents toward the strongest part of the knit.
4. The Engineered Toe Decrease
To close the stocking, we employ a wedge decrease. By systematically reducing the number of active loops at four specific points, we create a reinforced tip. We finish with a Kitchener stitch, which is a method of grafting live loops together to create an invisible, seamless join.
Mastery Tip: The Kitchener stitch mimics the path of a knitted row, maintaining the capillary action of the fibers. This ensures that the toe is just as strong as the rest of the garment, with no weak "seam" to burst under the weight of a heavy orange or toy.
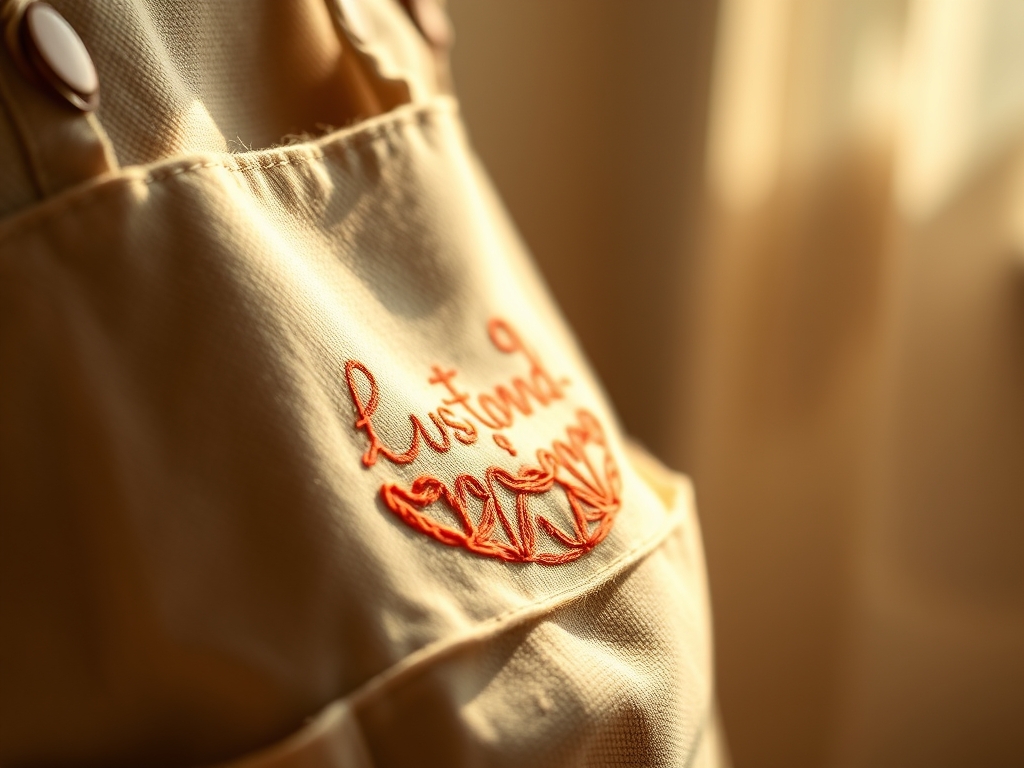
5. The Personalized Embroidery
Once the structure is complete, we use a duplicate stitch to add names. This involves following the path of the existing "V" stitches with a contrasting yarn. It doubles the thickness of the fabric in the lettered areas, making the name pop with a three-dimensional effect.
Mastery Tip: This is essentially structural layering. By adding a second layer of fiber over the first, you are increasing the local density of the fabric, which prevents the letters from distorting when the stocking is stretched.
THE TECHNICAL LEDGER
Maintenance & Longevity: To keep your Personalized Knitted Stockings in museum-quality condition, never hang them by the wool loops alone. Use a hidden nylon reinforcement inside the cuff. Wash only in cold water with a pH-neutral detergent to prevent the fibers from "felting," which occurs when the microscopic scales on the wool interlock permanently.
Material Variations: For a sustainable approach, look for GOTS-certified organic wool. If you want a luxury finish, cashmere blends offer a soft halo effect, though they require a tighter gauge to compensate for their lower tensile strength compared to highland wool.
The Correction:
- The Sagging Cuff: If the top stretches out, weave a thin strand of elastic thread through the back of the ribbing.
- The "Ladder" Effect: If you see gaps between needles, use a crochet hook to pull the slack through the adjacent stitches to redistribute the tension.
- Puckered Colorwork: Use a steam iron and a damp pressing cloth to "block" the fabric, which relaxes the fibers and evens out the tension.
Studio Organization: Store your completed stockings in acid-free tissue paper inside a cedar chest. Avoid plastic bins, as they can trap moisture and lead to mildew or fiber degradation. Label each project with a brass tag detailing the yarn brand and dye lot for future repairs.
THE FINAL REVEAL
Look at that finish! The way the light catches the ply of the yarn and the crispness of the embroidered names is pure magic. When you hold a finished stocking, you should feel the weight and the density; it should feel like a piece of soft armor for your holiday hearth. These Personalized Knitted Stockings are more than just decor; they are a testament to your technical skill and your eye for detail. The mantle is officially ready for its upgrade, and you have the satisfaction of knowing every stitch is engineered for a lifetime of memories.
STUDIO QUESTIONS
How do I choose the right yarn for stockings?
Select a high-twist wool or a wool-nylon blend. The nylon provides the necessary tensile strength to hold heavy items, while the wool offers the classic "bounce" and thermal texture required for a traditional festive aesthetic.
What is the best way to prevent holes in the heel?
Use the "Wrap and Turn" method during short-rows. This technique closes the gap between rows by anchoring the yarn around the base of the stitch, ensuring the structural integrity of the heel's pivot point remains intact.
Can I machine wash my knitted stockings?
Only if you use Superwash wool. Otherwise, the heat and agitation will cause the fibers to felt, shrinking your stocking into a stiff, unusable mat. Hand-wash in cool water and lay flat to dry for maximum longevity.
How do I keep my colorwork from looking messy?
Maintain consistent yarn dominance. Always hold the background color in your left hand and the pattern color in your right. This ensures the "floats" stay uniform and the tension remains even across the entire diameter of the stocking.