
The smell of freshly pressed cotton and the slight, metallic tang of a sharp needle are the first things that hit you when you dive into the world of Hand Stitched Fabric Books. It is a tactile playground where every stitch is a structural decision. You are not just sewing; you are engineering a soft-sculpture narrative that has to withstand the relentless grip of a toddler. Think about the friction between the fibers and the way a heavy-duty thread bites into the weave. This is high-stakes crafting where the tensile strength of your seam determines if a page survives a spirited tug-of-war. We are building five distinct sensory zones, each designed to trigger a specific neural response through texture, sound, and visual contrast. This project is the ultimate marriage of domestic art and mechanical durability. Grab your shears and clear the workbench because we are about to transform a stack of flat remnants into a multidimensional heirloom that feels as good as it looks.
THE STUDIO KIT
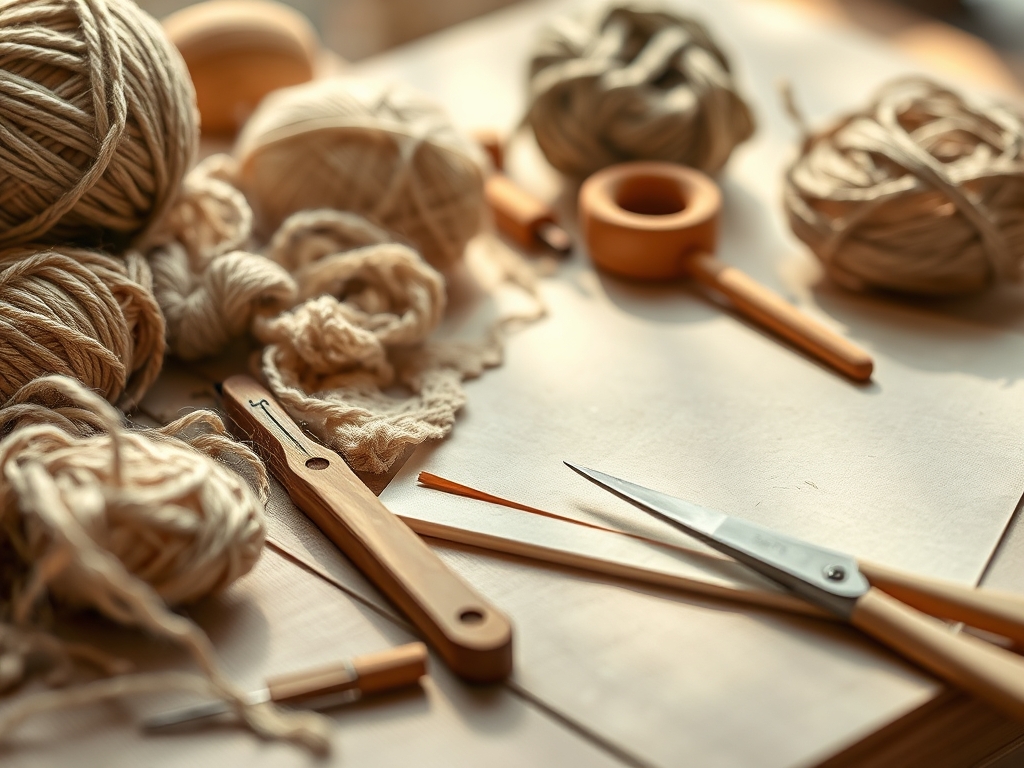
To build a professional-grade sensory book, you need a kit that respects the physics of textiles. Start with 100 percent cotton duck or heavy canvas for the base pages; these provide the necessary structural integrity to support heavy embellishments without sagging. You will need a rotary cutter and a self-healing mat to ensure perfectly squared edges, as even a one-millimeter deviation will cause the spine to bind unevenly. For the stitching, skip the standard all-purpose thread and opt for a high-denier bonded nylon or a 12-weight pearl cotton. These threads offer superior abrasion resistance against constant handling.
Your toolkit must include a tailor's awl for piercing dense layers and a bone folder to crisp your seams before topstitching. For the sensory elements, gather materials with varying porosity and friction coefficients: smooth silk ribbons, abrasive glitter felt, and crinkly biaxially-oriented polyethylene terephthalate (mylar) film. If you cannot find specific stabilizers, a Material Substitution of heavy-duty fusible interfacing or even recycled denim can serve as a rigid core for your pages. Always keep a pair of precision calipers nearby to check the thickness of your page "sandwich" to ensure it fits within your binding's capacity.
THE TEMPO
The "Maker's Rhythm" is a three-stage cycle: Preparation, Execution, and Finishing. Expect to spend approximately two hours on material preparation, which includes laundering fabrics to remove sizing and pre-shrinking fibers. The Execution phase, where the actual hand stitching occurs, is the most labor-intensive, requiring about three hours per page. This is where the meditative flow state happens; your hands learn the resistance of the needle through the ply of the fabric. Finally, the assembly and binding phase takes another four hours. Total project time usually clocks in at twenty hours. Do not rush the cooling period after heat-pressing your interfacings, as the adhesive needs time to polymerize and create a permanent bond.
THE CORE METHOD
1. Squaring the Foundation
Before the first stitch, you must ensure your grainline is perfectly straight. Use your rotary cutter to slice 8-inch by 8-inch squares. If the grain is skewed, the page will warp over time due to uneven tension. Mastery Tip: This is about dimensional stability. By aligning the warp and weft of the fabric with the edges of your page, you prevent the "bias stretch" that causes handmade books to look lopsided after a few months of play.
2. Layering the Sensory Core
Sandwich a layer of "crinkle" material or low-loft batting between your decorative face and the structural backing. Pin the layers from the center outward to avoid air pockets. Mastery Tip: Utilize capillary action awareness when using fabric glues for temporary holds; a tiny amount goes a long way, and too much will seep through the fibers, ruining the tactile "hand" of the fabric.
3. Executing the Blanket Stitch
The perimeter of each page should be finished with a tight blanket stitch. This stitch provides an external "skeleton" that protects the raw edges from fraying under high-friction use. Mastery Tip: Maintain consistent thread tension. If you pull too tight, the fabric will pucker; too loose, and the edge loses its structural reinforcement. The goal is a uniform "V" shape along the edge.
4. Integrating High-Contrast Elements
Apply felt shapes or ribbons using a backstitch for maximum security. These elements are the primary "pull points" for a child. Mastery Tip: Consider the shear strength of your attachments. A single point of failure can be avoided by "anchoring" your knots behind the interfacing layer, distributing the force across a larger surface area.
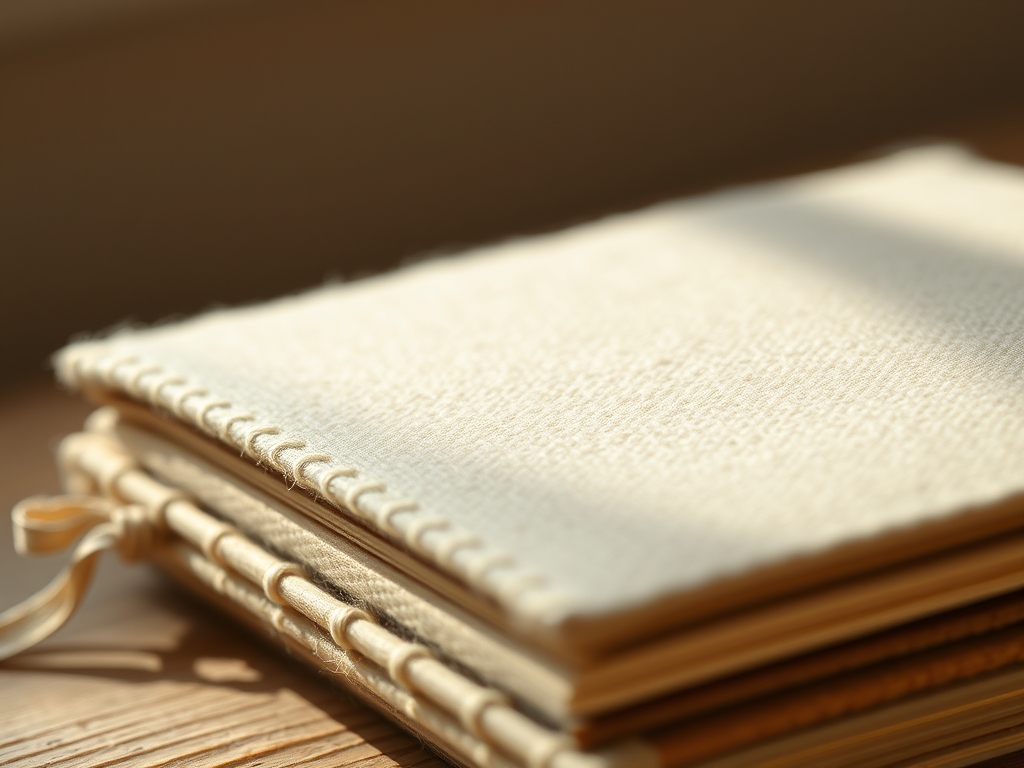
5. Engineering the Spine
Stack your five pages and use a heavy-duty upholstery needle to create a "Coptic" or "Long-Stitch" binding. This allows the book to lay completely flat when opened. Mastery Tip: This is a lesson in mechanical leverage. A tight binding prevents the inner pages from sliding, which reduces the saw-like friction that eventually cuts through sewing threads.
THE TECHNICAL LEDGER
Maintenance & Longevity: To preserve the integrity of Hand Stitched Fabric Books, spot clean only with a pH-neutral detergent. Avoid machine drying, as the high heat can degrade the synthetic fibers in the sensory "crinkle" layers and cause the adhesives to delaminate.
Material Variations: For a Sustainable approach, use organic hemp canvas and beeswax-coated linen thread. For a Premium version, incorporate wool felt and silk embroidery floss, which offer a superior tactile range compared to polyester alternatives.
The Correction:
- The Pucker: If your page is wrinkling, your thread gauge is likely too heavy for the fabric weight. Fix: Switch to a finer needle and decrease tension.
- The Slump: If the page won't stand up, the internal stabilizer is too weak. Fix: Insert a hidden layer of stiff non-woven peltex.
- The Fray: If edges are shedding, the stitch density is too low. Fix: Reinforce the border with a tighter overcast stitch or a fabric sealant on the raw edge.
Studio Organization: Store your fabric books in a cool, dry environment away from direct UV light. Sunlight triggers photodegradation in natural dyes and weakens the tensile strength of cotton fibers over time. Use acid-free tissue paper between pages if the book contains "sticky" elements like silicone or vinyl.
THE FINAL REVEAL
Look at that! You have successfully navigated the complex physics of soft-goods engineering. Your finished Hand Stitched Fabric Books are not just toys; they are masterpieces of structural integrity and sensory delight. Each page offers a different "coefficient of friction" and a unique acoustic profile, from the sharp snap of a button to the soft rustle of silk. The weight feels substantial in the hand, a testament to the high-density materials and the thousands of micro-tensions held within your stitches. You have created a durable, beautiful tool for development that can survive the chaos of the playroom while looking like a gallery piece.
STUDIO QUESTIONS
Why use cotton duck for the base?
Cotton duck has a high thread count and a plain weave, providing excellent dimensional stability. It resists stretching and tearing better than standard quilting cotton, ensuring the book maintains its square shape despite heavy handling and repeated cleaning.
How do I prevent the "crinkle" layer from melting?
Most crinkle materials are heat-sensitive plastics. Always use a pressing cloth and set your iron to a medium-low temperature. Never apply the iron directly to the sensory film, as it will cause immediate thermal deformation and loss of sound.
What is the best thread for durability?
A 12-weight pearl cotton or a bonded nylon thread is ideal. These threads have a high tensile strength and are thick enough to resist being pulled through the fabric weave when a child tugs on the book's components.
Can I use a sewing machine instead?
While possible, hand stitching allows for variable tension control and the ability to navigate thick, uneven sensory layers that might jam a standard machine. Hand stitching also creates a more durable, "locked" stitch that is harder to unravel.

