
Imagine the sharp, crystalline bite of mountain air hitting your face while your ears stay cocooned in a cloud of high-performance fiber. We are talking about the ultimate intersection of alpine fashion and thermal engineering. When you dive into the world of Personalized Knitted Headbands, you are not just playing with yarn; you are manipulating protein fibers to create a bespoke microclimate for your scalp. Feel that crimp in the wool? That is nature's built-in spring system. It traps air pockets to provide insulation while allowing moisture to escape before it freezes against your skin. This project is about mastering the tension of the knit to ensure your gear stays put during a high-speed descent. We are going to blend the raw, oily resilience of sheep wool with the silky tensile strength of luxury blends. This is not your grandmother's knitting circle; this is high-octane textile architecture designed to withstand sub-zero wind chill. Grab your needles and let us get technical with these seven warm wools.
THE STUDIO KIT
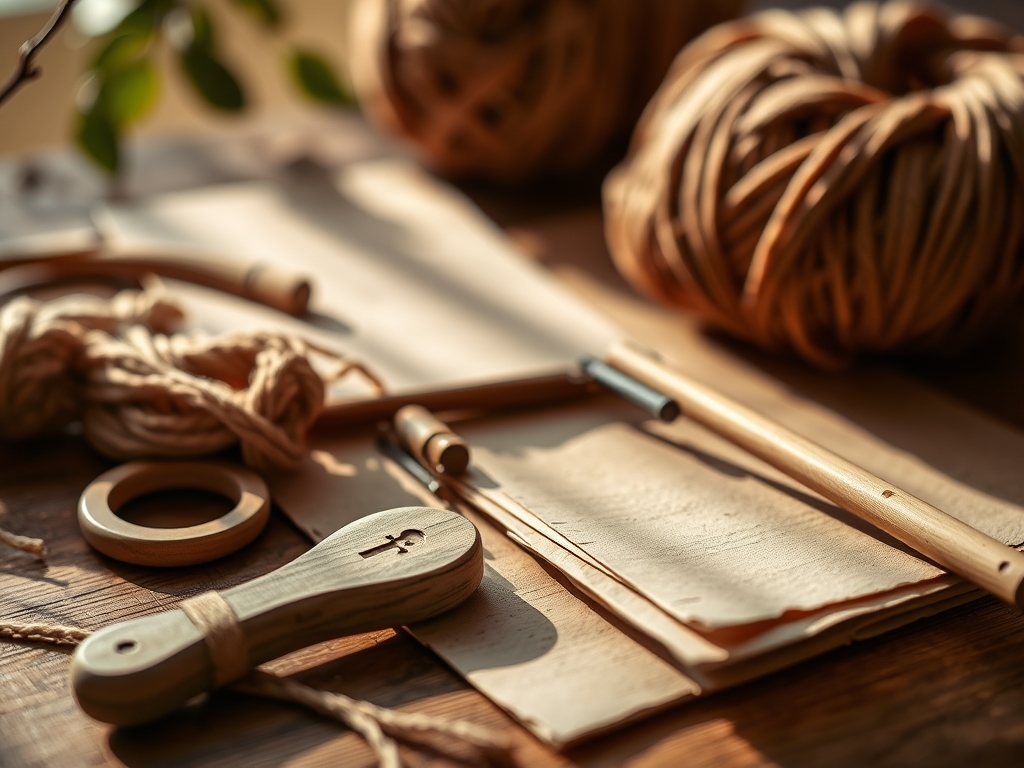
To engineer the perfect headband, you need more than just a ball of fluff. Start with a pair of ergonomic circular needles made from surgical-grade stainless steel or carbon fiber. Metal needles offer a lower coefficient of friction, allowing your stitches to glide with minimal effort. You will also need a digital caliper to measure the exact diameter of your yarn, ensuring your gauge remains consistent across the entire piece. A blunt-tipped tapestry needle is essential for weaving in ends without piercing the delicate ply of the wool. For the personalized elements, keep a set of alphabet stamps and leather scraps nearby to rivet custom nameplates onto the finished band.
Material Substitutions: If you are allergic to sheep protein, swap the wool for a high-twist pima cotton and bamboo blend. While it lacks the natural elasticity of wool, the bamboo provides incredible antimicrobial properties. For maximum heat retention without the bulk, look for qiviut, the inner wool of the muskox, which is eight times warmer than sheep wool by weight.
THE TEMPO
The creation of Personalized Knitted Headbands follows a specific industrial rhythm. Expect to spend approximately four to six hours from the initial cast-on to the final blocking. The "Maker's Rhythm" is divided into three distinct phases. Phase one is the Calibration Phase (30 minutes), where you knit a swatch to calculate your stitch density. Phase two is the Production Sprint (3 to 4 hours), where the repetitive motion of the knit-purl cycle creates a meditative flow state. Finally, the Finishing Protocol (1 hour) involves the technical assembly, steam blocking, and hardware installation. Respecting this tempo prevents hand fatigue and ensures the structural integrity of the fabric.
THE CORE METHOD
1. The Foundation Cast-On
Begin by creating a long-tail cast-on to provide a stretchy, durable edge. This method uses two strands of yarn to create a built-in cord at the base of your work, which is vital for headbands that must expand and contract repeatedly. Ensure your loops are not strangled against the needle; they need enough room to slide.
Mastery Tip: This step relies on tensile distribution. By leaving a consistent gap between stitches during the cast-on, you allow the finished edge to stretch without snapping the individual fibers. If the edge is too tight, the headband will migrate up your head during physical activity.
2. Establishing the Ribbed Architecture
Knit a 2×2 rib pattern (knit two, purl two) for the first inch. This creates a corrugated structure that functions like a mechanical spring. The "knit" stitches sit forward while the "purl" stitches recede, creating a bellows effect that traps warm air against the skin while providing a secure, non-slip grip.
Mastery Tip: This is an exercise in structural elasticity. The alternating columns of stitches create a fabric that is significantly more elastic than a flat jersey knit. This ensures the headband maintains its "memory" and does not become permanently distended after a few uses.
3. Integrating the Thermal Core
Transition into a honeycomb cable or moss stitch for the main body of the headband. These textured patterns increase the surface area of the yarn exposed to the air, which maximizes the thermal insulation properties of the wool. Use a cable needle to cross groups of stitches, creating a dense, wind-resistant barrier.
Mastery Tip: Observe the capillary action within the fiber. A denser, textured stitch pattern creates more "dead air" space. In fluid dynamics, these pockets act as insulators, slowing the transfer of heat from your body to the freezing mountain air.
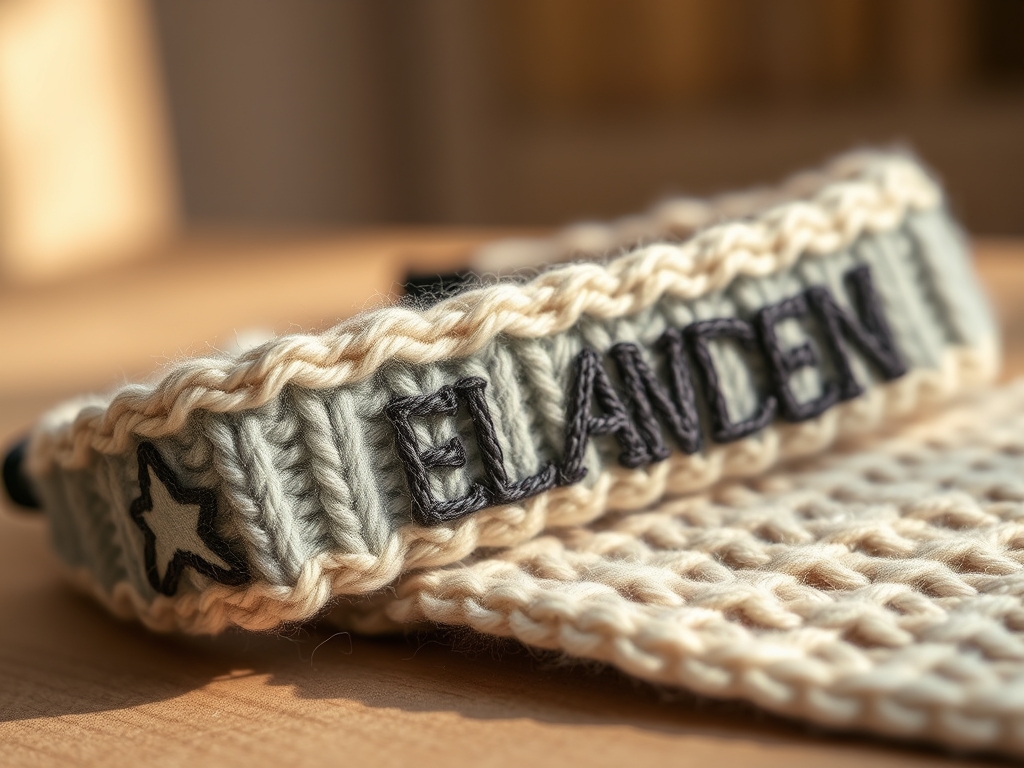
4. The Personalized Embellishment
Once the length reaches approximately 18 inches, prepare your personalization. Using a rotary cutter, slice a small rectangle of vegetable-tanned leather. Use a 1/16-inch leather punch to create holes at the corners. Stamp your name or initials into the leather using a heavy mallet to ensure a deep, permanent impression.
Mastery Tip: Consider the material hardness scale. Leather is significantly denser than wool, so it must be attached using a "floating" technique. By sewing the leather plate on with a slight slack in the thread, you prevent the rigid leather from tearing the flexible wool fibers when the headband stretches.
5. Seamless Grafting
Join the two ends of the headband using the Kitchener stitch. This technique involves weaving the yarn through live stitches to create an invisible, seamless join that mimics the look of a continuous row of knitting. This eliminates the bulky ridge often found in cheap, store-bought accessories.
Mastery Tip: This step is all about load-bearing continuity. A seam is a point of failure; by grafting the stitches together, you distribute the mechanical stress of the headband evenly across the entire circumference, preventing "hot spots" of pressure against your forehead.
THE TECHNICAL LEDGER
Maintenance & Longevity: Wool is a biological fiber that requires specific care. Never use high-heat agitation, which causes felting (the irreversible interlocking of fiber scales). Instead, soak your headband in lukewarm water with a pH-neutral detergent. Lay it flat on a micro-fiber towel to dry, reshaping it to its original dimensions to preserve the fiber memory.
Material Variations:
- Merino: High crimp, soft hand-feel, excellent for sensitive skin.
- Icelandic Lopi: Dual-layered fiber that is naturally water-repellent.
- Cashmere: Ultra-fine micron count for maximum luxury and heat.
- Recycled Wool: Sustainable option that often features a rugged, rustic texture.
The Correction:
- The Saggy Band: If the headband is too loose, thread a thin strand of transparent elastic cord through the top and bottom ribs to restore tension.
- Dropped Stitches: Use a crochet hook to "ladder" the stitch back up to the current row, ensuring the twist matches the surrounding fabric.
- Pilling: Use a battery-operated fabric shaver or a specialized wool comb to remove loose surface fibers that have tangled into balls due to friction.
Studio Organization: Store your wool in airtight polypropylene bins with cedar blocks. This prevents oxidation of the fibers and protects your investment from keratin-eating pests like clothes moths. Label each bin with the yarn weight and dye lot for future repairs.
THE FINAL REVEAL
Behold your masterpiece. This is not just a headband; it is a custom-engineered thermal shield. The texture is deep and architectural; the personalized leather tag adds a touch of professional "maker" prestige. When you pull this on before hitting the slopes, you will feel the immediate engagement of the wool's thermal properties. It is snug, it is stylish, and it is built to survive a blizzard. You have successfully turned raw fiber into high-performance gear.
STUDIO QUESTIONS
Which wool is best for high-intensity skiing?
Merino wool is the gold standard. Its fine micron count prevents itching while its natural moisture-wicking properties move sweat away from your skin, keeping you dry even during heavy exertion. It also possesses natural odor-resistant qualities for long lodge days.
How do I ensure the headband doesn't slide down?
Maintain a tight gauge during the ribbing sections. Using a needle one size smaller than recommended for the yarn creates a firmer, more resilient fabric that grips the head securely without losing its shape over time.
Can I use acrylic yarn for these headbands?
Acrylic lacks the thermal regulation and moisture-wicking capabilities of natural wool. While it is durable and cheap, it can trap sweat against your skin, which may eventually freeze and cause discomfort in extreme alpine conditions.
What is the best way to clean my headband?
Hand wash in cool water using a wool-specific soap. Avoid wringing the fabric, as this distorts the tensile alignment of the fibers. Roll it in a towel to remove excess moisture and dry flat away from direct heat sources.

