
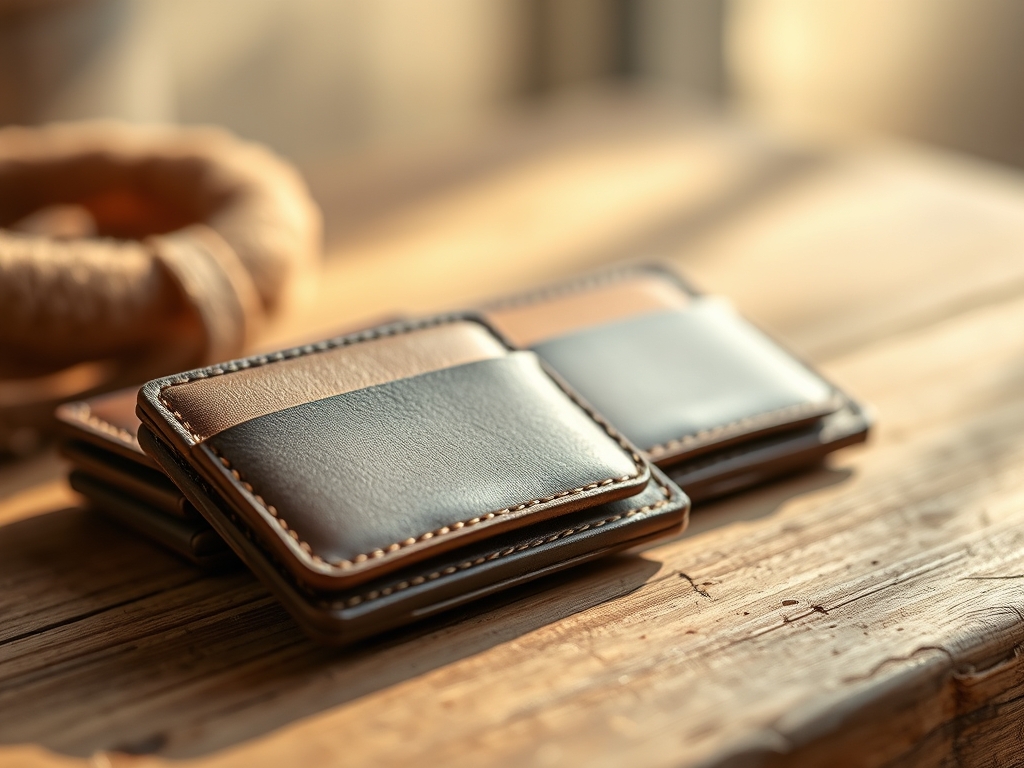
Close your eyes and imagine the scent of a high-end tannery. It is that intoxicating mix of birch oil, earth, and ancient chemistry. When you hold a piece of vegetable-tanned hide, you are feeling the result of collagen fibers being stabilized by tannins. Today, we are channeling that raw energy into creating Custom Leather Card Holders that defy the bulk of traditional wallets. We are aiming for a six-pocket slim profile that feels like a second skin in your pocket. This is not just a craft project; it is an exercise in structural engineering on a miniature scale. We are manipulating the tensile strength of the leather to ensure that even with six slots, the profile remains razor-thin. You want that satisfying click when a card slides into place, a sound born from perfect friction and precise measurements.
THE STUDIO KIT
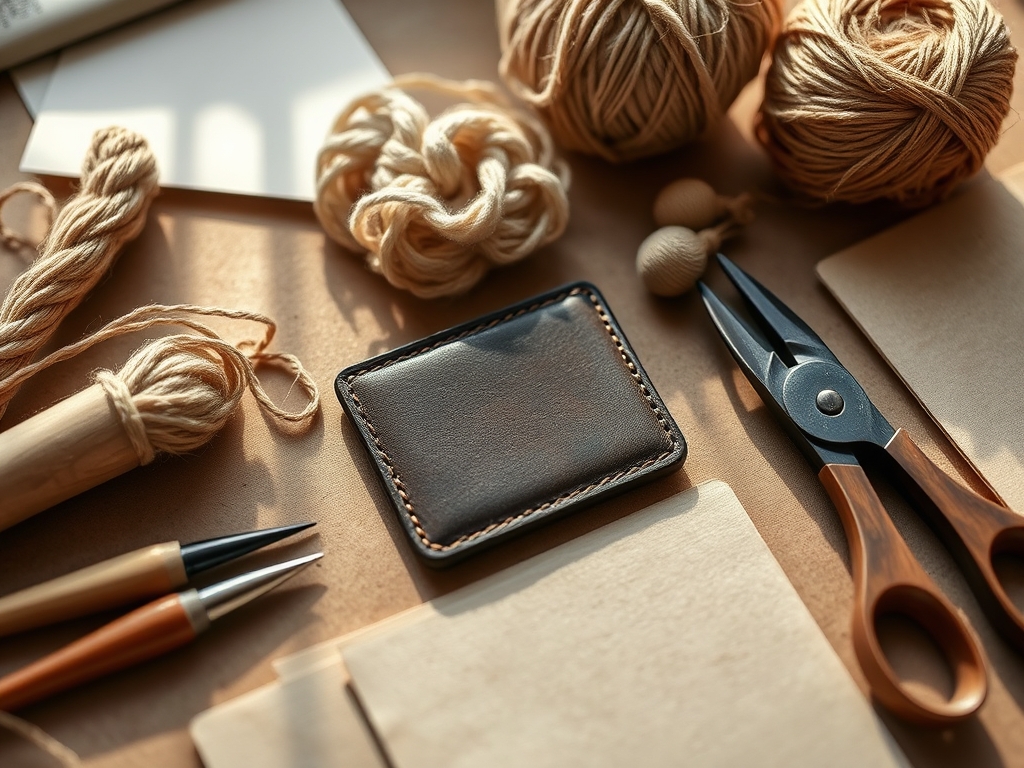
To execute this build, you need a kit that respects the material physics of the hide. We are using 2.5-ounce (1.0mm) vegetable-tanned leather because it offers the perfect balance of flexibility and rigidity. If you go thicker, the six layers will become an unmanageable brick. If you go thinner, the pockets will stretch and lose their grip over time. Your primary weapon is a Japanese skiving knife, which allows for the microscopic thinning of edges where layers overlap. You will also need a scratch awl for marking, a diamond-tipped stitching chisel for consistent hole spacing, and 0.6mm waxed polyester thread for high-tension seams.
For material substitutions, if you cannot source traditional veg-tan, look for "crazy horse" leather, which is infused with waxes that provide a self-healing surface. However, avoid chrome-tanned upholstery leather. It lacks the internal fiber density required to hold a burnished edge, meaning your wallet will eventually look like a frayed rag rather than a professional accessory. Grab your calipers and a steel ruler; precision here is measured in tenths of a millimeter.
THE TEMPO
The "Maker's Rhythm" is all about respecting the drying times and the physical resistance of the material. This project requires a focused four-hour session. The first hour is the "Calculation Phase," where you map the grain direction. Leather has a directional pull; if you cut against the grain, your pockets will sag. The second hour is "The Preparation," involving the repetitive, meditative act of skiving edges to reduce bulk. The final two hours are the "Assembly and Stitching," where the pace slows down. You cannot rush a saddle stitch. The rhythm of the needles passing through the hide creates a consistent tension that prevents the leather from puckering.
THE CORE METHOD
1. Mapping the Grain and Cutting
Start by identifying the tightest grain on your hide. Use your rotary cutter to slice the main body and the five additional pocket flaps. For Custom Leather Card Holders, the internal pockets must be cut 2mm narrower than the exterior shell to account for the "turn of the cloth."
Mastery Tip: This adjustment accounts for geometric displacement. When you fold a piece of leather, the outer layer must travel a longer distance than the inner layer. By cutting the inner pockets slightly smaller, you prevent the leather from bowing outward when the wallet is closed.
2. Skiving for Invisible Transitions
Take your skiving knife and thin the bottom 5mm of each pocket piece. You are aiming for a "feather edge" where the leather tapers down to almost nothing. This is essential for a six-pocket design. Without skiving, your stacked edges would be over 6mm thick; with proper skiving, we can keep the total edge under 3mm.
Mastery Tip: Skiving relies on the shear strength of the collagen fibers. By cutting at a shallow angle, you remove bulk without compromising the structural integrity of the top grain, allowing for a flush fit during the glue-up.
3. The Precision Glue-Up
Apply a thin layer of water-based contact cement to the skived edges. Wait for the adhesive to become tacky. This is a chemical bond, not a mechanical one. Align the pockets using your bone folder to press out any air bubbles. The alignment must be perfect; even a 0.5mm offset will be magnified once you start stitching.
Mastery Tip: Contact cement works through molecular adhesion. As the solvent evaporates, the polymer chains in the glue interlock. Pressing the pieces together with a bone folder increases the surface area of the bond, ensuring the pockets never shift under the pressure of credit cards.
4. Punching and Stitching
Mark a stitching line 3mm from the edge using a wing divider. Use your mallet and diamond chisel to punch through all layers. Use a saddle stitch technique, which involves two needles on a single thread passing through each hole from opposite directions. This creates a locking mechanism that will not unravel even if a single stitch is cut.
Mastery Tip: The saddle stitch utilizes frictional resistance. Because the threads cross inside the leather, the tension is distributed evenly across the hide, preventing the holes from elongating over years of use.
5. The Professional Burnish
Sand the edges with 400-grit sandpaper until they feel like a single piece of wood. Apply a drop of water or gum tragacanth and rub the edge vigorously with a wooden slicker. The heat generated by the friction will fuse the fibers together into a glassy, smooth surface.
Mastery Tip: This process is called thermo-plasticization. The heat and friction cause the natural tannins and waxes in the leather to rise to the surface and harden, creating a waterproof seal that protects the internal fibers from moisture.
THE TECHNICAL LEDGER
Maintenance & Longevity: To keep your slim holder in peak condition, apply a light coat of neatsfoot oil every six months. This replenishes the internal fats that keep the fibers supple. Avoid over-conditioning, as this can make the leather too soft, causing it to lose its ergonomic shape.
Material Variations: For a sustainable twist, use cactus leather or pineapple leather (Piñatex). These materials have a high tensile strength but require specialized adhesives because they are less porous than animal hides. For a premium feel, shell cordovan is the gold standard, though it requires a much sharper blade due to its extreme density.
The Correction:
- Mistake: The pockets are too tight to fit a card. Fix: Insert two cards into the pocket and use a hair dryer to gently warm the leather. The heat allows the fibers to stretch slightly and take a "set."
- Mistake: The stitching line is wavy. Fix: Use a groover tool to create a shallow channel before punching. This guides the chisel and keeps the thread flush with the surface.
- Mistake: The edges are fraying despite burnishing. Fix: You likely skipped the sanding phase. Re-sand with a higher grit (up to 800) and use beeswax for the final burnish to provide a more durable coating.
Studio Organization: Store your leather flat in a dark, climate-controlled area. UV light breaks down the tannins, leading to "red rot," while humidity can cause the leather to swell and lose its temper.
THE FINAL REVEAL
Look at that profile! Your six-pocket masterpiece is a testament to the marriage of physics and art. The way the light catches the burnished edges and the rhythmic precision of the saddle stitch makes this more than a wallet; it is a high-performance tool for the modern minimalist. You have successfully navigated the complexities of grain direction and geometric displacement to create something that will outlast any mass-produced alternative. Carry it with pride, knowing every millimeter was engineered by you.
STUDIO QUESTIONS
What is the best leather weight for slim wallets?
A weight of 2.0 to 3.0 ounces (0.8mm to 1.2mm) is ideal. This thickness provides enough structural integrity to hold cards securely while allowing the finished product to remain thin enough for front-pocket carry.
How do I prevent my cards from falling out?
Ensure your pocket width is only 2mm wider than the card itself. The natural friction of the leather's flesh side, combined with the tension of the saddle stitch, creates a secure grip that improves as the leather breaks in.
Can I use a sewing machine for this project?
While possible, a standard home machine lacks the torque to penetrate multiple layers of veg-tan leather. A hand-sewn saddle stitch is significantly stronger and allows for the thick, waxed threads that define the custom look.
Why is my leather turning dark during burnishing?
Darkening is a result of friction-generated heat and the oxidation of tannins. It is a sign of a successful burnish. If it darkens unevenly, ensure your edge is sanded perfectly flat before applying moisture or friction.

